If you are not in favor of heavy capital brick or small-block garages that require a solid foundation and roofing, then you can opt for a metal one for one car. Such a construction can be done in a fairly short period of time. In this case, the fastening of the main elements can be performed both by welding and using bolts with nuts.
In this article we will explain how to make such a garage, we will demonstrate the drawings, photos and video materials.
Foundation
 Foundation for the garage
It is believed that the metal garage is light construction, which requires a purely symbolic foundation (only around the perimeter, deepening it by only 20-25 cm and approximately the same width). Another option is to pour a concrete plate reinforced with a grid, which will simultaneously be the foundation and a subfloor, or lay factory floor slabs on the ground.
However, in any case, the following conditions should be observed:
- the top of the foundation or slab-foundation must be 15-20 cm above the ground level so that it does not flow during rain or snow melting water;
- the surface of the foundation or slab must be strictly horizontal;
- in the corners of the foundation or solid slab, small sections of reinforcement must be concreted to which the frame will be welded to.
It is better to pour the foundation at a time so that it constitutes a single monolithic element. Since when creating a strip foundation, a not too large amount of concrete is required, you can use a concrete mixer and make concrete directly at the location of the garage.
Manufacturing
 Fastening the trim to the frame
Garage dimensions for Storage of one car is 3.3 by 5.5 (or 6) meters. At the same time, if you plan to carry out insulation (for example, mineral wool), each of these sizes should be increased by 15-20 centimeters.
The frame can be welded from a metal corner of a large section - this will make the structure rigid and durable. All work is performed immediately at the place of installation.
The frame assembly process consists of the following steps:
- First, the lower frame is welded (do not forget to weld it to the cores projecting from the concrete in the corners of the structure so that the outlets of the reinforcement are inside the structure).
- Then the vertical corner posts are welded.
- In the front part, two side racks for gates are installed and fixed.
- All fixed racks in the upper part are interconnected by an upper frame.
- After that, it is necessary to perform the roof supporting elements, while:
- with a single-sided roof, the front side racks must be higher than others (the roof slope will be towards the rear wall);
- with a gable roof, you will also have to weld triangular truss structures and weld them to the upper frame.
Intermediate posts along all walls are welded with equal pitch to enhance the strength and rigidity of the whole structure. The pitch of the rack depends on the width of the metal sheet, which will be welded to it as part of the wall.
If the sheets are overlapped, the distance between the posts should be 4-5 cm less than the width of the sheet.
 Creating the frame
The external frame is welded to the finished frame or attached with the help of bolts and nuts sheathing. It can be made of forged sheets of galvanized or non-galvanized steel, as well as corrugated flooring. In all cases, the thickness of the metal must be at least 1.2 mm.
On the roof, sheets start to be fastened from the overhangs to the ridge, observing overlapping of the upper sheets to the lower 15 cm.
Gates
 Welding of the gate
Gates for the garage you can choose any, but the most popular are the swing doors. They can also be welded right on the installation site in a similar pattern: first, the frame of the sheets is welded, then the metal lining is welded to it.
Insulation
 Insulation of the garage
If the metal garage is not insulated, then Changes in weather conditions may cause condensation to form on its walls. The easiest option of warming is use of polystyrene foam plates. They can simply be glued from the inside to the casing between the frame racks.
Polystyrene foam (polystyrene) has a big disadvantage: it burns. And the garage, the fire room (there are gasoline cans standing there, and a car with a full gas tank, and all sorts of other combustible automotive liquids).
It is better to use non-combustible heat-insulating materials as a heater (for example, min. Wadding in the form of hard mats), closing it from the inside of the room with any sheet material (OSB, chipboard, MDF, etc.) .
Video
Photo

 Garage Roof
 Metal garage from inside
 Garage for two cars
 Design dimensions of the structure
Drawings
The following drawings will help you determine the size of the garage, the configuration of the roof and the type of gate:
 Layout of types of doors
 Garage dimensions from corrugated
 Calculation of the door size
 The project of the garage of corrugated
 Frame with measures
 Garage frame
 Drawing with dimensions
 Drawing of a shell garage
 Drawing of a two-car garage
Search
Related Articles
What pipes are better for plumbing?

When designing the water supply to a country house, you should take into account all the nuances of this work, namely, the system to which you will connect, the correct choice of the route for layin...
Shelves for flowers do it yourself from wood, chipboard

What kind of housewife wouldn’t want to transform the look of her room with the bright colors of blooming violets, begonias or geraniums? It is aesthetically pleasing, a little refreshing, and gener...
Do-it-yourself concrete pool - concrete pool + photo
Building a pool is not the easiest thing, especially if it is a pool of concrete. However, with certain skills in construction work, as well as remarkable patience, you can create a rest corner on y...
How to cover the roof of the house - the choice of roofing material
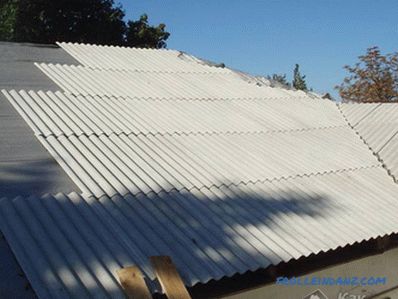
Before you start building a house, you need to decide on many questions and one of them concerns the choice of material for the roof. It is necessary to choose a coating that will protect the buildi...
We lay laminate flooring on a wooden floor with our own hands - features of work (video and photo)

Laminate flooring today is one of the most popular flooring materials. It is used in both residential and commercial establishments. In order to lay the laminate on the floor, there must be a previ...