The chaise lounge can become not only part of the beach, but also a country site. And to make this exterior element look harmonious with nature, you can make it yourself. Before you make a chaise lounge with your own hands, you should consider what design the design will have. As a rule, deck chairs have the ability to change the position from sitting to lying down.
")
Sun loungers can be of three types: reclining, reclining and sedentary.
Tools and materials
- wood;
- bars;
- boards;
- jersey;
- screwdriver;
- drill;
- angle;
- screws;
- sanding sheet;
- varnish.
Production of a lattice chaise lounge
")
Scheme of frame assembly of a chaise lounge.
The first version of the chaise lounge, which is based on a wooden lattice, can be used instead of a bed. The design will have a flat base and adjustable backrest. The main disadvantage of the described construction is the fact that it is problematic to move around the section independently. However, you can use rollers to solve the problem.
In order to make such a chaise longue, you should stock up with a slab, the thickness of which is equal to 18 mm, it should be based on glued spruce wood. Wooden bars with a cross-section equal to 45x45 mm will be necessary for the work, they will be used for the manufacture of the frame. In the process of covering the side parts of the structure, boards with a thickness of 25 mm will be needed. Used drills for wood should have a diameter of 40 mm. The technology involves the use of four mounting angles for beds. As a fastener, you need screws that have a secret head. The lounger can be moved using four rollers 100 mm high. The surface of the wood is to be treated with a sanding sheet with grit ranging from 120 to 240. The coating may be varnish or paint intended for work on wood.
When buying a slab, it is preferable to purchase one based on conifers, this is due to the fact that they are resistant to precipitation. The dimensions of the structure can be any, but, as a rule, deck chairs have dimensions equal to 60x190 cm.
Starting to make a deck chair with your own hands, you need to make 2 long and as many short sides. They will form the basis of the frame structure, their fastening among themselves must be made through the corners. The outer side of the frame should be covered with boards. On long planks, departing 8 cm from the corner, you need to fix the legs, they are based on bars 10 cm long. The legs can be fixed to the boards with screws with a length of 60 mm.
")
Board layout of the chaise lounge.
Now you can install the wheels. To do this, in the central part of the short legs should be mounted rollers, their fastening must be made with screws with a length of 30 mm.
In order to make the grille, you will have to cut boards with dimensions equal to 60x8 cm from the jigsaw. You need to fix the slats to the lounger using self-tapping screws, and you need to ensure a gap of 2 cm. through special spacers.
If you intend to make such a chaise with your own hands so that it has an adjustable backrest, the grille should be divided into 2 parts, one of which will become a lounger, the other - a headboard. Both parts must be installed on the connecting boards and strengthened among themselves by means of the door hinge. In order to equip the mounting plate, between the long bars of the structural frame, it is necessary to reinforce the transverse rail. The support stand must be fixed on the mounting plate, its fixation must be made on both sides with screws.
At this stage, we can assume that the construction is ready, but the surface of the lounger has to be processed, for which a grinder can be used, after which the wood should be varnished.
Manufacturing technology of a fabric chaise lounge
Making a chaise lounge with your own hands is permissible according to another sketch, which can be seen in fig. 1.
At the heart of this design is also a frame.
")
Figure 1. It is convenient to store a fabric chaise longue, as it can be folded.
This chaise longue is extremely convenient to store, as it is foldable.
To manufacture the structure, prepare slats with a rectangular section, their dimensions should be 25x60 mm, 2 slats should have a length of 120 cm, two more should be 110 cm, and the same number of slats should be 62 in length cm. To assemble the framework, you will need slats with a circular cross section and a diameter of 2 cm, one rail should have a length of 65 cm, two others - 60 cm and two more - 50 cm each. For the fabric component, you will need strong fabric with dimensions of 200x50 cm. The elements are to be fixed with nuts and furniture bolts D8 mm.
It is preferable if the slats are made of durable and hard woods, among them birch, oak or beech. The material can be canvas, jeans or tarpaulin.
After cutting the slats should be treated with sandpaper.
")
Figure 2. The dimensions of the elements of the chaise lounge: a, b - the main frame; in - an emphasis regulator.
In fig. 2 you can see the size of the elements. Under the letters A and B are designated the main frames, C - the stop-regulator. In the long rails of the main frames, departing from the corners of 40 and 70 cm, it is necessary to form holes with a diameter of 8 mm, then, using a round file, they must be sanded. In order for the design to allow you to change the position of the backrest, frame B should be equipped with 3-4 cuts in increments of 7-10 cm. You can arrange the seats by drilling holes of 2 cm in diameter, making them necessary with a departure from the 2 ends of the rails. In the holes, you need to install the cross, which act as round slats, in advance of their ends need to lubricate the PVA.
Now you can begin the installation of the deck chair, for this you need to connect the elements A and B with screws that should be passed through the upper holes. The same technology should be used when connecting elements A and B, but this should be done through the lower holes. Then you can start cutting out and sewing the seat. The length of the fabric must be determined by the possibility of folding. The prepared fabric should be treated in the area of the edges, only after the fabric needs to be nailed to the round slats, which are on elements A and B. The edge of the fabric should be wrapped around the cross member, and then strengthened with small studs that have thick caps.
Installation of the folding chair
")
Figure 3. Table by which the number and length of bars should be determined.
The loungers themselves are comfortable, but you can sit on them either lying or reclining, and the Kentucky chair will allow you to relax in a sitting position. It is based on bars. For the work it is necessary to prepare bars with dimensions of 45x30 mm, galvanized wire D 4 mm, brackets made of galvanized. The chair can also be made from bars whose dimensions are 50x33 mm, they can be made by cutting into 3 parts of the board with dimensions of 50x100 mm.
Instead of galvanized wire and staples, it is permissible to use studs. In fig. 3 you can see the table by which the number and length of bars should be determined. The drawing shows where it is worth performing through holes. Their diameter should be 2 mm greater than the thickness of the wire. The surface of the bars need to be treated with sandpaper. When assembling the frame, one should be guided by the drawing, which shows the dotted lines of the place where the wire should be threaded. Grabbing the ends of the wire, to raise the chair. Now you can trim off the excess nippers and bend them with brackets.
Before making a deck chair, you can choose from the above described a suitable design.
Didn't find the answer in the article? More information on the topic:
-
")
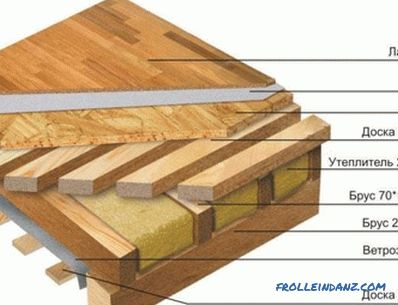
How to make a wooden floor on the ground?
Wooden floor on the ground: the device of the coating, the required materials and tools. Technical features of the work stages. The process of mounting your own hands.
Search
Related Articles
Installation of thermopanels - how to install front panels
A clinker tile thermopanel is a unique combination of finishing material with insulation. This material has proven itself as a finishing material for building facades. If you are looking for a ratio...
How to solder polypropylene pipes do it yourself + video
Polypropylene pipes are increasingly being used to mount heating and water supply systems - regardless of whether a new pipeline is being laid in your house, or the old system for supplying heat (wa...
Sound insulation stretch ceiling in the apartment

Owners of an apartment in a high-rise building, along with the cherished housing, also receive a weighty problem - poor sound insulation. Just a few years ago it was quite difficult to isolate onese...
How to build a dock with your own hands
For people living next to a river or pond, convenient access to water was always a pressing issue. Previously, for these purposes, bridges were built along which it was possible to pass to the tied...
general rules, schemes (photo and video)
Wood floors are made not only in wooden houses, but also in brick buildings. This floor looks great and helps to create a good microclimate indoors. Laying a wooden floor is easy to do with your ow...