Finishing works and installation of flooring occur at the last stage of repair work. After the installation of windows, doors, walls, ceiling, covering them with the final material should proceed to the final installation of solid wood flooring. This material looks like laminate and parquet, but much more durable and more practical. Installation of a solid board with your own hands should occur only when the walls and floors are completely dry, the relative humidity in the room should not exceed 60%. The temperature at the floor level cannot be less than 10 ° С in building standards, and 18–22 ° С indoors.

The layout of a massive board.
Installation of flooring
Preparing the subfloor for laying
- The subfloor should be leveled, the grooves and elevations removed, sometimes 10-12 plywood can be used mm The maximum slope is allowed within 2 mm for every 2 m. You should not neglect the tips, because after a few years the laid planks will creak from every movement. These will be the consequences of unfair preparation.
- All material must be delivered 7-10 days before installation begins in the room where it will be placed. Packages should be unpacked and placed on the bars. It is necessary to do this in order for the material to become stable at room temperature and the laid sheets will not be deformed.
- Strips need to be expanded in color, quality, and select those elements that can go to the junction and undergo pruning.
Methods for installing flooring

Layout for laying solid wood on logs.
- In the first version, the dies can be laid on wooden logs. Wooden bricks of 50 * 50 mm are used as supports; you can fix them to the concrete floor (on the screed) with dowels or glue mortar. If communications or a warm floor are laid in the floor, then it is wiser to put them on glue or mortar containing bitumen. Lags are located at a distance of 50 cm from each other. The space between them is filled with any sound or heat insulating material. If the board is mounted on the ground floor, without a basement, then a moisture-proof film is placed between the lags and the board. By adjusting the bars using the planer, maximum alignment is achieved.
- The traditional way is installation on plywood. A more popular method is the use of moisture resistant plywood with a thickness of 12-15 mm. Large sheets are cut into small pieces of 50 * 50 cm or 40 * 60 cm. On the floor surface the sheets are placed in such a way as to prevent coincidence of the corners. Sheets are 5 mm apart from each other, 10-12 mm from the wall, but not more than 15 mm. Plywood is fastened to dowels and screws or glue. If screws are used, the heads go deeper into the canvas.
- Installation without the use of additional materials. In the case of an ideal surface and finding a room where you plan to install the board yourself, at the level of the second and subsequent floors you can do without the use of an intermediate link.
- Laying solid wood on a wooden floor. If the room has an old, but good floor, then it should be leveled with a belt sander, cleaned from litter and dirt. Sheets are fixed diagonally or longitudinally on the cleaned surface.
- You can lay a new coating directly on the screed, it should be fixed with a special adhesive that is resistant to temperature changes. This option is used for fixing on the warm floor. Pre-screed is tested for moisture. If the current humidity level exceeds the permissible figure of 6%, then the coupler should be waterproofed.
Board installation: options

A plan for attaching a solid board to a screed.
The installation of the first row of the board should be carried out very carefully, since the whole series of material depends on its location. Move it 10-12 mm away from the wall for thermal expansion. The massive board on glue which does not contain a water basis fastens. The massive board turns around to the wall with a groove and is fixed through the front side with a screw or a nail.
The second and subsequent rows are fitted with a rubber hammer or with a bar, the minimum gaps are insulated with glue, so moisture will not flow through them.
After carefully pressing the board and shrinking on the glue, it is fixed with screws or studs using a pneumatic tool. Nails are hammered at an angle of 45 ° C into the spike places, which are subsequently closed by the next floorboard.
An innovative approach to the installation of solid wood
With the advent of one-sided adhesive backing, elastinol, the need for laborious work is significantly reduced. The substrate has excellent sound and thermal insulation properties. Its use ensures reliable fixation of the floorboard and protects the swelling.The lining is placed on the screed adhesive side up, after which the massive board is mounted from one wall to another.
Laying a massive board in this way eliminates the use of screws or nails, the construction of labor-intensive platforms and elevations, you will not need to fill in the screed either.
The first and last rows are fixed on the front side of the material, and these grooves are subsequently closed with plinths.
Finishing

Types for laying solid wood.
Floorboard from an array may or may not have a factory varnish coating. After the board is laid, it should be sanded and varnished. From 3 to 7 layers of lacquer coating can be laid on the surface of the board; after each, the surface should be polished with a disk tool. The number of layers affects the strength and specularity of the floor.
The installation of baseboards is carried out according to the recommendations of the manufacturer. After that, a reliable and durable coating will last for a long time, and your own installation efforts will save you a substantial amount of savings.
Required tool
In the course of work, you may need a certain tool:
- test and measurement equipment - building or water level, tape measure;
- screwdriver and matching nozzles;
- circular saw for sawing longitudinal and transverse slats;
- perforator and drills of the desired diameter;
- vacuum cleaner and soft rags for dusting at the final stage;
- paint and brush containers.
Using the above recommendations, flooring from an array can be done on its own.
By carefully cleaning the room and not exceeding the humidity level, the solid wood board will serve for a long time and will delight you with the structure of natural wood.
Didn't find the answer in the article? More information on the topic:
-

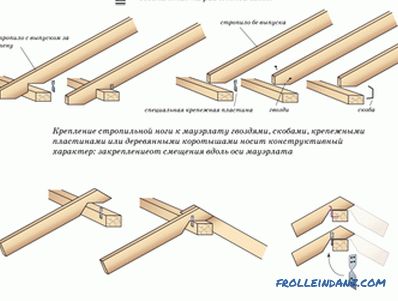
Types of mounting for rafters
Varieties of rafters. Rafters and plates for their fastening. Features truss-beams. Original truss mounts.
Search
Related Articles
Bearing rafters on the mauerlat: construction mounting technology
Mauerlat is one of the main elements of the roof structure. It is attached to the rafters. The operational period of the entire roof depends on the quality creation of the truss structure. Ro...
Which water filter for washing is better, rating of filters according to user reviews + Video

Many people do not want to use tap water for food. Indeed, without purification, it can impart an unpleasant taste and smell of coffee and tea, make soups and broths not so tasty and fragrant. There...
How much does it cost to pour a solid foundation?
Creating a solid support for the construction is quite a difficult process for labor and money. In order to estimate how much it costs to pour a monolithic foundation, let us outline the main stages...
How to insulate a water pipe - instructions for insulating water supply
A properly constructed piping system is only part of the job of organizing an uninterruptedly functioning water supply. The plumbing system must be warmed if it is laid above the level of soil freez...
materials and tools, work order (video)
The squeak of natural wood floor leaves no one indifferent. Even the most inveterate lyricists, who consider the creaking to be music at home, will eventually lose their temper. Not surprising, bec...