In the 21st century, there are thousands of finishing materials, but among others there are some that are particularly popular among people, such as lining. Do-it-yourself installation of the wall paneling is quite simple and quick, and it does not require a set of special skills or tools.
")
Winging installation scheme.
Preparation of walls and ceilings
Tools and materials:
- tape measure;
- level;
- bar 50 * 80;
- wooden wedges;
- insulation;
- vapor barrier;
- perforator;
- hammer;
- screwdriver.
At the very beginning, you need to prepare the walls for installing the wall paneling yourself, and this will require several steps:
- Measuring the walls for evenness.
- Mounting of the batten.
- Laying insulation.
- Installation of vapor barriers.
")
Figure 1. The supporting system of two clamps is the simplest and most convenient solution for installing the clapboard.
Walls vary vertically in each corner, and the measurement is made not only by the angle of inclination, but also by the height. This is necessary in order to coordinate their work in the future, and at the same time stock up wedges. If it turns out that the walls are without roll, then the preparatory activities will be simplified many times.
Already at this stage it is necessary to determine what direction the pattern will have, since the location and pitch of the batten depends on this:
- Vertical pattern. Here the crate is used horizontal with a step of 40-45 cm.
- The horizontal pattern of the crate is vertical with a step of 30-35 cm.
- The Christmas tree is unique not only because of its complexity of execution, but also because the crate can to be any, but its step depends on the length of the wall panel used.
When the installation of the wall panel is chosen, it is necessary to take into account the fact that the horizontal room visually expands the room, while the vertical one makes it higher. Herringbone, in turn, just looks much more interesting.
Installation is carried out on screws with dowels, for which a hole is first drilled through a bar and a wall, then a long dowel is driven in, and at the very end a screw is screwed. Each step is carried out with the support level, which is carefully measured the working space. If necessary, wedges are placed under the bars to level the working space.
As soon as the crate is fully assembled, insulation can be laid. If the walls of the house are wooden, then mineral wool will be an ideal option, since it allows air to pass through, so that there will be no mold and fungus on the walls. For stone walls, in turn, the most dense expanded polystyrene is used. The material is placed in its place so as not to leave cold bridges, and if necessary, cut in both cases, you can use the construction knife.
")
Tools for installing the wall panel.
If mineral wool was used, then the very last layer will be vapor barrier, but when using polystyrene foam it will not be required. Vapor barrier perfectly passes air, but does not allow condensate to accumulate. Installation is carried out using a special stapler.
Preparing the ceiling for installing lining is much more difficult, but only technically, because you have to work in an awkward position.
Main activity
Tools and materials:
- level;
- lining;
- jigsaw;
- screwdriver;
- clamp;
- tape measure;
- hose clamps.
Once you have fully managed to prepare the crate, you can begin the installation of the wall panel. To do this, cut the board of the desired length and is applied to the place of its future dislocation so that the tooth is located in the direction of the wall, and the groove in the direction of the next board.
For fixation, aluminum or galvanized screws are used, for which narrow holes are drilled, after which the fastening element itself is screwed. On the reverse side, clamps are fixed to the lower part of the groove, which will reliably keep the tree from changing.
The next board is already inserted into the groove with a tooth and snapped to the limit. After that, a wooden bar is applied and on the reverse side slack blows are made on it with a hammer, which will help to complete the installation of the wall paneling. Fastening clamps to all bars is necessary to avoid misunderstandings. The clamp itself is fixed on the screws, and its special advantage lies in the possibility of dismantling the wall panel without any consequences.
This is how the work continues to the last board, which usually slightly exceeds the required dimensions in width. Therefore, it needs to be cut longitudinally with an electric jigsaw, and from the side of the former groove, make the necessary number of small holes for screws. Further fixation is performed without any complications.
Additional aspects
Installing lining your own hands on the ceiling is quite a laborious process, during which you have to invent a supporting system. The most convenient and easiest option is the “crawling” insurance of 2 collars (fig. 1), which moves itself as it works.
The installation instructions are always the same, so you need to stick to it without any discrepancies. And when the installation process is completed, you can begin to operate the premises at the same time, because there is no need to expect anything.
Usually it takes up to 3 days to finish one room at 20 m2, but with ideal starting parameters (even walls) and a full hand, you can cope in one working day.
Didn't find the answer in the article? More information on the topic:
-
")
How to make the floor on the balcony yourself?
Step by step instructions on how to make the floor on the balcony with your own hands. Useful tips and tricks, tools needed for the job. Optimal flooring material on the balcony.
-
")
How to fix the wall panel correctly?
Instructions on how to fix the wall paneling. Basic tips and advice when working with different surfaces. The need to use crates. Performance of installation works.
Search
Related Articles
Which sealant is better to choose for the bathroom

Bathroom refers to rooms with high humidity. That is why during the repair and finishing works it is necessary to select the appropriate materials that are resistant to moisture. An important step i...
Installation of polypropylene pipes do it yourself
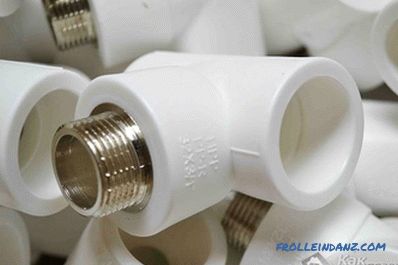
The greatest demand for the installation of plumbing or heating systems are pipes made of polypropylene. The material used in the manufacture of pipes extends their service life to 50 years. The pol...
Abyssinian well do it yourself - how to do it (instruction)
Initially, the Abyssinian well was named after the inventor - Nortonovsky. However, soon this man was forgotten, and since the first such well was installed in Abyssinia, such water sources began to...
Brick garage with their own hands
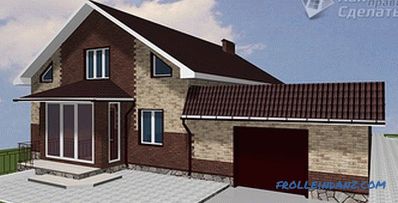
Many car owners would like to build a garage. And this is not surprising, because if you leave your transport under a canopy or just in the yard, it will not be protected from weather conditions or...
Which polycarbonate is better to use for the greenhouse

Currently monolithic and honeycomb polycarbonates of various thickness are colored and transparent. The nomenclature of polymeric materials of this type is diverse. The consumer appreciated the high...