For the device of floors it is possible to use various methods and materials. The most popular are flooring on logs, which can be made on any basis, including for floors on the ground. The main element of the design are wooden logs, they are stacked in a certain order. A heat insulator is mounted between the lags, communications can be laid. Then the top plating is sewn up. Plywood, chipboard, OSB, usual wooden boards which often act as a floor covering are usually used.
")
The floor on the logs is one of the most popular. The basis of this floor are wooden bars of a certain size.
Installing the floor lag can be done by various methods, it all depends on the need to level the surface, on other installation conditions. When laying it is necessary to follow exactly all the steps, the wood must first be treated with antiseptic and fire retardant to provide protection from insects and fire.
What are the advantages of lag?
The floor on the lags has certain advantages over other structures. It turns out not only durable, but also warm. This floor allows you to level the surface, arrange a quality flooring for soil foundations in private homes. Among the advantages it should be noted:
")
Lags provide the minimum load on the foundation.
- Thermal insulation characteristics, such a floor allows you to avoid heat loss.
- Saw-timbers for work are distinguished by an attractive price, they are much cheaper than a concrete screed, which requires a certain experience in arrangement.
- A minimum load is placed on the foundation, this is significant for frame and dilapidated houses. Such floors are suitable for wooden floors.
- The floor can be installed at any level that is required.
- The consumption of building materials is minimal, which has a positive effect on the budget.
- The construction time is minimal, there is no need to wait for the solution to harden, except for the floors on the ground, where pouring is done under supports.
- An optimal microclimate forms inside the room.
- Lagging floors can be made independently, no special experience is required anymore.
")
Construction of wooden floor along the logs.
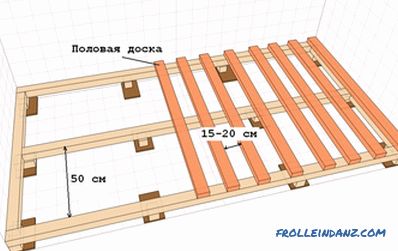
During installation, you need to correctly determine which direction the logs will stand. To install the lag of the subfloor there are rules. Finishing decking is always performed parallel to natural light, and logs should go in the opposite direction . It should be foreseen in advance so that later you don’t have to correct everything.
If the laying of the floor is planned for rooms with a large passage intensity, then lags need to be laid in the direction of travel in order to strengthen the structure and prevent its loosening. It is important to immediately foresee how the floorboards will go, how the cladding plates will go if plywood is used. All fasteners of the finished floor should fall on the logs themselves in order for the flooring to be durable.
Fasteners and installation methods lag
")
The scheme of fastening the lag to the concrete base.
To fix the lags to the base, various methods can be used. Previously, nails of the required size were used for this, but this method is not the best and durable, such fasteners quickly fail. Today, the best method is to use galvanized metal corners and dowels.
Lag mounting instructions:
- All metal corners are fastened with self-tapping screws. One plane of the corners is fixed to the wooden beam.
- The self-tapping screws are screwed to a depth of 3-5 cm.
- The bottom plane is attached to the bottom rail.
- For brick supports, it is necessary to make a waterproofing layer, after which additional fasteners should be made of dowels.
")
Lag docking options: end-to-end and grip ends on wood floor.
Instead of corners, you can use a special mount in the form of a U-shaped part. It provides a strong fixation, especially if the bars have to be increased. This method is applicable for large rooms where additional fasteners are required.
The lag joints themselves can be arranged in this way:
- Close to one another.
- By cutting. This method of docking is the most effective, but it is necessary to carry out the cutting very carefully so that the docking points are tight.
If it is necessary to reinforce the docking, nails are used and the fastener is sewn.
Additionally, you can use pieces of lumber that can be about 1 m in length. If the bars are mounted in a run, then a step of 50 cm or more must be observed between the connection points.
Installing the floor on the ground
Installing the floor on the lag is not as difficult as it may seem at first glance.They differ in the simplest design, they can be made for an apartment, a private house, a country cottage. Unlike concrete pouring, the weight of such a structure is less, but the floor is not inferior in strength.
To install the logs, you need to follow a fairly simple instruction:
")
A wooden floor plan on the logs on the ground.
- First, the soil base is inspected, after which the soil is thoroughly compacted with a vibrator. If there is no such equipment, then work can be done with a large diameter log.
- A layer of rubble is then poured on the ground, it should be about 5 cm. Such a layer will serve as a base.
- After that, it is necessary to build a formwork for each support separately. Pre-compiled layout of supports in accordance with the size of the premises, the conditions for the construction of the whole structure. If the formwork is ready, you can fill.
- Next, you need to build supports of brick. In this case, between the supports and the base it is necessary to provide a layer of waterproofing. This will reliably protect the structure from moisture. Above the brick support should be made another layer of waterproofing, mount sound insulation strip.
- Next are logs for the floor. Pre-cut boards into pieces of the desired size, then their surface is treated with an antiseptic and fire retardant. This will protect them from damage by insects, from mold, make them more protected from fires.
- Lags are fixed on the supports with special dowels, which ensure reliability and stability. After that, you can put a special cranial bar, perform the board primary flooring, you can use regular boards for it. After the roll forward, you can lay out another layer of waterproofing material.
- It is necessary to install a heat insulator between the lags. In this quality, you can apply a variety of material. Manufacturers offer a wide variety of insulation, suitable for floors on the logs. In this case, you can take expanded clay, other bulk materials, foam plates, mineral wool plates.
- During insulation, it is necessary to ensure that there are no air spaces and cavities left, since this will adversely affect the condition of the insulation, heat loss will be observed.
- After this, it is necessary to align the floor lags. The upper horizontal level is determined. All surpluses are cut, the horizontal level of coverage is checked by the building level.
- Finishing floor is mounted from plywood sheets or chipboard, any floor finishing materials can be laid on them. During installation, it is necessary to ensure that there is a temperature gap of 2 mm between the plates, and 10 mm between the plates and the wall. For durability, plywood can be laid in 2 layers, the total thickness of the siding is from 12 mm to 20 mm, it all depends on the floor requirements. Leave a small ventilation gap between the skin and insulation.
- After the floor paneling is complete, you must check the horizontal position of the floor again, and then polish the surface. In order not to damage the grinding machine, it is necessary to embed the heads of the self-tapping screws into the wood during fastening. The final step is laying the flooring. The process depends entirely on what kind of material was selected for work.
Should I use adjustable lags?
")
The mounting scheme of fasteners to adjust the height of the lag.
If the floor is not so flat, then its height can be easily adjusted with lags. For this purpose, special fasteners are used that can withstand a significant load, up to about 5 tons for each 1 m². Adjusting elements can be made of metal or special plastic. These are threaded elements that can be given the necessary height. Lags are attached to such elements, the required height is set. The floor and wall markings are preliminarily determined, which determines the level of finishing coating.
Dowels are used for the concrete floor, and self-tapping screws are used for the wooden floor, which can withstand the necessary loads. After that, all surpluses are cut off. Lags are mounted at the required height, if required, the heat insulator is filled up so that the floor is more comfortable and the microclimate is more pleasant. Plywood or chipboard is laid on top, after which you can begin to install the floor covering.
Lagging floors are a sturdy and reliable structure that allows leveling the surface. Making such a floor with your own hands is easy, there are many options, among which you can choose the right one. For work, only boards for the manufacture of log, heat insulator and sheets of plywood or chipboard for finishing plating are needed.
Didn't find the answer in the article? More information on the topic:
-
")
How to fix Euro-rail correctly? 2> Step-by-step instructions on how to fix the lining with your own hands. Materials and tools needed for work. Installation of this coating using klyaymerov.
-
")
Guide to covering the balcony with wood
The process of covering wood balcony. The necessary tools and material for plating. Warming and creating a frame for plating. Features trim the walls of the balcony or loggia.
Search
Related Articles
How to make a waterproofing floor
If you are thinking about how to properly waterproof the floor, then obviously you are doing repair work in your home. This question requires a responsible approach, a certain amount of experience a...
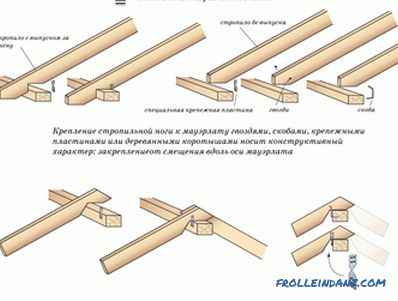
Installing MowerLat: Installation Methods (video)
Mauerlat is part of the roof and has an important role in the uniform distribution of the load from the roof. The installation of the power plate is done in several different ways. The choice dep...
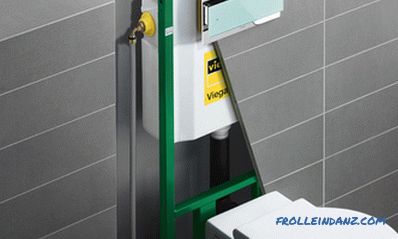
How to choose an installation for a pendant toilet
To avoid all sorts of problems when installing plumbing fixtures, you need to know how to choose an installation for a toilet bowl. The range of installations is large and an ignorant person can qui...
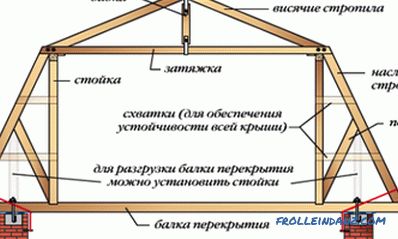
Rafters do it yourself (photo and video)
To make your own rafters, you need to carefully consider all stages of work. Problems with them will not arise if the work is performed in strict sequence and with careful observance of technology....
calculation of the beam section and the step between them
Many owners of summer cottages choose wooden floors when building houses. This is due to the fact that wood is an environmentally friendly material that has aesthetic appeal and natural naturalness...