When carrying out repairs in residential apartments, it is often necessary to manufacture so-called false walls, which are a fairly fashionable and common nowadays room decoration technique. Such a wall of plasterboard will completely transform the interior of the living space.
The need for such structures may also arise in the case of redevelopment of residential spaces due to the manufacture of partitions that completely imitate a real wall. With regard to the materials used in the preparation of such structures, for their arrangement most often used classic drywall.
Before you make a false wall of plasterboard, you should carefully read the requirements that apply to the order of such works. One of these requirements is the need to prepare all the necessary tools, as well as materials used in the manufacture.
Materials and tools
 Drywall
Before you start the installation work you need to stock up the following consumables:
- sheet gypsum board in quantities corresponding to the total area of the spaces to be closed;
- special profiles used for installation or wooden bars of a given section;
- nails dowels, as well as metal and wood screws (in some cases, butterfly dowels may be required);
- special primer and putty mixes used for surface finishing.
 Wall profile for plasterboard
In addition, you will definitely need the following tool:
- wooden mallet or hammer;
- metal hacksaw (electric jigsaw);
- electric drill, rotary hammer and electric screwdriver;
- a set of several types of spatulas;
- level, well-sharpened knife and tape measure.
 Electric jigsaw
Surface preparation
When carrying out finishing works Special attention should be paid to the preparation of surfaces that serve as the basis for decoration. In our case, such a surface is the plane of the supporting frame, assembled from standard metal profiles or wooden bars of your chosen section.
 Wooden frame
Even before the false wall takes its final form, you have to do issues related to the placement of communications used on this site. In addition (if necessary) will have to worry about the arrangement of heat and sound insulation.
In practice, two types of frames made of widely used materials can be used as the basis for plasterboard walls. First of all - it is a classic wooden crate, characterized by relative cheapness and ease of execution. The second type of frame is a rigid metal structure assembled from profiles of a given size.
 Attaching the frame
Unlike a wooden scraper, which is not different special durability, the life of the metal frames is practically unlimited. In addition, most of the elements of this design are resistant to moisture and moisture, which eliminates the need for their additional protection.
Frame profiles from the profile are easily restored after mechanical damage and can always be reused. The only drawback of such structures is their price, the value of which significantly exceeds the cost of wooden analogues.
Installation of the metal frame
 Installation of the false wall
As an example we suggest you consider the option of arranging the wall with sliding interior doors, implemented by yourself.
 The marking of mounting brackets
The assembly of the metal frame for such a design should be done in the following sequence:
- the marking of the supporting surfaces of the floor and the ceiling below the guide profiles is carried out first;
- followed by the marking of the seats of the brackets installed on the main walls;
- after that the brackets and guides profiles are attached to the positions prepared for them in accordance with the marking made;
- and at the end of the assembly along the marking lines on the level are installed vertical pillars that set the position of the door pillars and the plane of the upcoming decoration.
 Assembly of the frame from the metal profile
It is clear that during the preparation of the frame it should be provided space for a sliding door hidden in the thickness of the wall to be mounted. Fastenings for the door structure must be installed in advance, which allows the subsequent adjustment of the movement of the blade along its guides.
Finishing
 Clad trimming
After the frame is installed and thoroughly locked in place - you can begin to finish it. All frame cladding operations are carried out according to a known scheme in the following order:
- first of all, drywall sheets prepared for the mounting dimensions of the mounted frame are prepared;
- the finished sheets are laid near the venue work in the sequence corresponding to the order of their installation in the frame cells;
- the installation of blanks is best to start from the capital wall, followed by finishing the entire area of the frame;
- the screws used for fastening are screwed in 1525 cm increments ; at the same time their heads should be completely embedded in the thickness of the material.
Grouting joints
 Grouting drywall
At the final stage works on the arrangement of the false walls are done by grouting the joints formed at the junction points of the drywall blanks, as well as the removal of small irregularities that are always on the surface of the sheets. In this case, the trowel mixture is processed not only the seams, but also the caps of the self-tapping screws recessed into the material. After that, using fine-grained pelts, the surface of the future partition is carefully polished.
Thanks to this operation, you should get a perfectly flat plane that does not have any visible flaws. Upon completion of grouting and grinding, the surface prepared for finishing shall be primed manually or using a special roller, and then thoroughly puttied.
After high-quality grouting and puttying on the surface of the wall construction, even the smallest traces of seams and self-tapping screws should not remain.
Recommendations of specialists
 Galvanized self-tapping screws
are best To get acquainted with a number of recommendations coming from people with great personal experience of working in this class. Experienced experts advise to pay attention to the following working points:
- It is not allowed to use drywall in rooms with a high humidity level (above 85%) and temperatures below plus 10 degrees Celsius.
- Before starting putty work, it is recommended to ventilate the room to reduce the humidity in it. In addition, the direct installation of false walls should also be carried out in conditions of full ventilation of living spaces.
- It is desirable that self-tapping screws used as fasteners have a zinc coating, which excludes the possibility of formation of rusty stains on the surface of the partition.
In no case do not try to save on spackling operations. Such a "savings" you noticeably reduce the service life of materials used in the finishing.
Video
Watch a master class on the construction of a false wall made of plasterboard by Alexey Zemskov:
Search
Related Articles
What is the difference between apartments and apartments?
Today, apartments occupy more than 30% of the total market of new buildings and are becoming increasingly recognizable and in demand. We are offered modern construction technologies, high-quality de...
How to install a satellite dish yourself

If several years ago satellite dishes were an element of luxury, then today everyone can afford such a television. Such plates receive broadcasting from a satellite that is located above the equator...
Do-it-yourself installation of ceramoplast - installation instructions
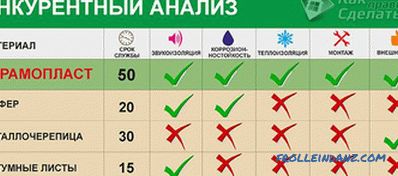
In connection with the development of technical progress in the field of construction, the range of materials for the roof expands every year on the market. They are characterized by durability, str...
Scandinavian style kitchen - how to create an interior design, 70 photo ideas
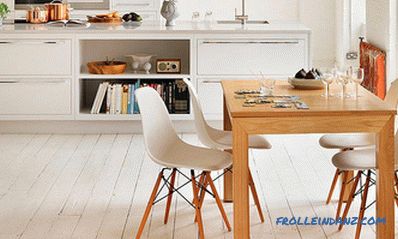
You can enjoy the many benefits of Scandinavian design without actually realizing that you have already accepted this timeless style with all your heart. Born in the edges of the harsh Northern Euro...
What is cheaper - to build a house or buy a ready, 3 ways to your home
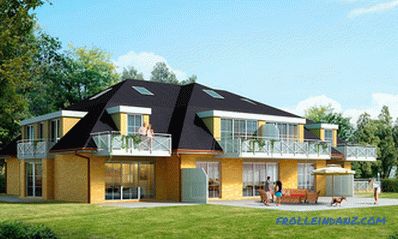
Dreams of their home are visited by many - because it means freedom, no neighbors behind the wall, living earth under their feet. You can build a house, you can buy already built - the price of the...