Among many finishing materials, wood panels in the form of lining and relatively new material in our construction market under the name of block house occupy a far from last place. This is a slightly modified lining. From the long-known lining block house differs in its front surface, which simulates a rounded log. The block house has excellent performance, excellent quality and durability. But all this is achieved only with proper installation and fastening of the material.
Decorating a house with a block-house panel is not particularly difficult; you can do this work yourself with simple tools.
The fixing of the house block is not particularly difficult. Anyone with small skills in using simple tools is able to cope with this job. Each board of this finishing material has exactly the same size. Their connection with each other takes place with the help of a kind of lock consisting of spikes, which are included in the corresponding grooves.
Tools for work
For installation work, the house block needs tools:

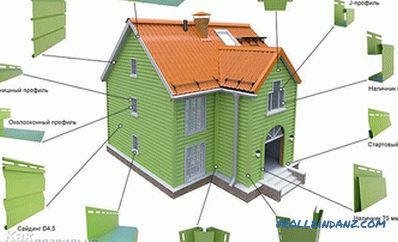
Parts for joining panels and corner panels block house.
- hammer;
- screwdriver or screwdriver;
- nails, self-tapping screws or blades;
- level;
- electric jigsaw.
You will also need:
- panels of the house block;
- corners;
- treated bars;
- antiseptic compositions ;
- putty or putty on wood;
- pencil;
- stencil;
- thin jute cord;
- sandpaper;
- block;
- hacksaw fine-toothed.
Mounting the block of the house

Mounting diagram of the block of the house
The facing is attached to the crate mounted on surface wall or ceiling. It is made of wooden bars or metal profiles. The batten (frame) on the wall is leveled and adjusted with the help of level and plumb. Only in this case, the finished wall will be smooth and beautiful. Boards are laid horizontally with a thorn up. The bottom board should be separated from the floor at a distance of about 20-50 mm. Between the upper board and the ceiling leave the same distance. This is done in case of thermal expansion of the material. The gaps are covered with baseboards.
The panels are usually fastened with nails or screws. It is recommended to use nails with a material thickness of up to 21 mm. Thicker boards are better attached to the crate with screws. For thin material are special fasteners - klyimery. All screws, nails, screws and klyaymery should have a galvanized or anodized surface. They do not corrode and leave no trace of rust on the finishing material. The length of fasteners should be 1.5-2 times the thickness of the block house. The installation of the cladding can be started both from below and from above.
Methods of docking the house block

The finish scheme of the brick house block house.
Often during the execution of a block-house surface finish, there is a problem of joining individual planks to extend them or to design interior and exterior corners. There are several ways to do this.
Method 1. The boards are sawn at an angle of 45 degrees and installed close to each other. A blind hole is drilled through a cylindrical surface, the diameter of which is slightly larger than the diameter of the cap of the screw. With both screws, both boards are attracted to the crate, caps are sunk inside. The hole is closed with a wooden plug, which is trimmed flush with the surface of the panel and sanded. This method is recommended when joining boards with a thickness of 40 mm or more.
Method 2. Straight-sided boards are installed end-to-end. The junction is overlapped with a special bar, which is produced by the same companies that make the block house.
Method 3. A more complicated situation may arise when you need to install the corners of a room. External corners can be arranged by zapilivaniya each board at an angle of 45 degrees. Work requires great accuracy. The miter box and the hacksaw with small teeth will help to perform this operation. Burrs need to be treated with sandpaper.
Method 4. You can not achieve a special density of the compound. Available in various sizes wooden corners. They cover the outer corner. The corner can be given some decorativeness by using drills of various sizes and wood cutters.
Method 5. The most difficult thing in the process of decorating the walls with a block house is the decoration of the inside corner. A simpler method is that a rectangular or square bar is vertically mounted in a corner. Its thickness should not be less than the thickness of the board, along with the crate. This board is strictly at right angle joined the board house block. The operation is repeated with the board mounted on the adjacent wall.A more complex option is to fit the end of the boards to each other in compliance with their relief.

Cutting angles at 45 ° requires great accuracy and accuracy.
For an exact fit, you need to make a thick cardboard template that follows the curved lines that form between the front surface of the board that fits close to the adjacent wall and the end of the board adjacent to the adjacent wall. The template fits on the back side of the board and at its end is outlined with a pencil. According to the resulting curve, the end face is sawed off with an electric jigsaw. The board is installed in its place and is tried on the adjacent board.
A pencil is applied to the already fixed board in such a way that its surface fits snugly to the block house, and the stylus rests on the board to be fitted. The pencil moves across the surface, the stylus draws a curved line on the board. With the help of a grinding machine, the excess material is removed, the end of the board after this procedure must exactly repeat the necessary curvature and take its place on the wall without gaps. Work takes a lot of time, but the skill is quickly gained. The internal corner turns out ideally equal.
Tips for working with the block house
- Boards before installation should lie down unpacked for several days in the room in which they will be mounted on walls or on the ceiling.
- Wooden bars for the manufacture of crates are recommended to be treated with an antiseptic.
- For finishing of external walls it is recommended to choose panels of the house block that are thicker and wider than for interior decoration.
- Installation of panels House block should be carried out in dry weather.
- The joints of the individual panels in the corners can be further processed with putty or putty for wood.
- Gaps left after mounting the block of the house can be masked with a thin decorative jute cord. It will give a unique look to the veneer.
- After finishing, walls can be covered with several layers of varnish or paint.
Among other finishing materials for cladding the external and internal walls, the block house is particularly popular: its installation is quite simple, but the appearance of the walls becomes completely unique.
It imitates a rounded log. The difficulty is only the design of the corners. But almost every man can cope with this task. It is only necessary to comply with accuracy and not rush, then everything will turn out.
Didn't find the answer in the article? More information on the topic:
-

Options for installing a subfloor
Proper installation of subfloor. Wet, dry and combined subfloor: styling features. Recommendations for the installation of the lower flooring. Necessary tool.
Search
Related Articles
Beige color in the interior and its combination with other colors + Photo
Beige. It can not be called a bright and juicy color. In fact, the beige color is often not paid attention, and it does not receive a sufficient assessment. This neutral shade is usually used as the...
Brick wall in the interior of the kitchen
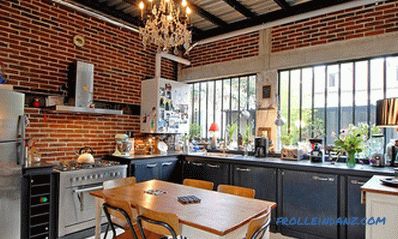
Gone are the days when old brick walls were carefully hidden under a more refined, modern finish. They are no longer considered ugliness. On the contrary, designers and homeowners seek to demonstrat...
How many lumber in a cube: the volume of timber (calculation table)
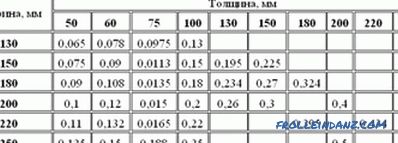
The volume of a unit of cut timber having standard dimensions is easily determined. Therefore, having a project at home, it is easy to calculate how much a bar (in pieces) will be required for the...
What is cheaper - to build a house or buy a ready, 3 ways to your home
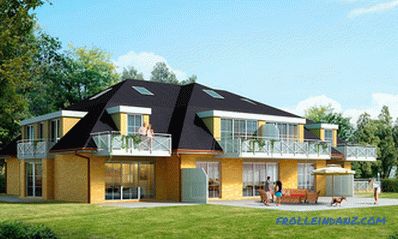
Dreams of their home are visited by many - because it means freedom, no neighbors behind the wall, living earth under their feet. You can build a house, you can buy already built - the price of the...
Do-it-yourself mounting siding - instructions for dummies
The main purpose of repairing an old house or building a new building is its modern, aesthetic interior and exterior. Many owners, choosing from finishing materials presented in the construction mar...