Even living in a comfortable house has its drawbacks. Often, residents of high-rise buildings face the inconvenience associated with drying washed clothes in an apartment where there is no balcony or loggia. In this case, the acquisition of a clothes dryer becomes a necessity. It should be noted that the dryer can be wall, floor and ceiling. Each of the types is designed for different rooms and loads. Factory fixtures, especially if they fit into the interior of the room, will become not only a functional device, but maybe even a stylish design element.
A self-designed device can be a good option for craftsmen, during assembly of which you can take into account all the nuances of further operation. A home-made design made from a good material on an accurate drawing may look better and more accurate than a purchased one. So, consider how to make a dryer.
Designing a floor fixture
 The original floor option
The floor dryer will take very little places if the design will resemble a table-book. When assembled, its width will be equal to 20 cm, length - 60 cm, height - 70 cm. It is necessary to prepare:
- chipboard 2 cm thick, lined with plastic: side panels 2 pcs. - 70 * 20 cm, top and bottom panel - 60 * 20 cm;
- M6 screw - 8‒10 pcs. ;
- furniture handle - 2 pcs. ;
- bushing in the form of a steel pipe - 22 * 2 mm;
- screed (steel pipe) - 18 * 2 mm;
- bars (stainless steel with a diameter of 3 mm) for grilles - 12 pcs. ;
- folding support (steel pipe) 16 * 1.5 mm - 6 pcs. ;
- framework for the grille (steel pipe) 16 * 1.5 mm: 4 pcs. - 60 cm, 4 pcs. - 70 cm;
- ring-stop in the form of a steel pipe 22 * 2 mm;
- M6 nut - 4 pcs. ;
- nut M3 - 48-50 pcs. ;
- polyethylene tip;
- furniture corners for the body (standard) - 4 pcs. ;
- furniture castors - 4 pcs.
Chipboard panels forming the dryer body are fixed with each other using steel corners and M6 screws equipped with countersunk heads and threaded bushings. On the bottom panel you need to attach 4 wheels. This will allow you to easily move the structure around the apartment.
Screeds with a section of 1.8 cm, having the appearance of a metal pipe, are installed in the upper part of a chipboard panel and connect the clothes dryer housings to each other. Nuts pressed into the holes at both ends of each metal tie must be fixed by welding (cold). The M6 screws screwed into them will securely fasten the panels to each other, giving strength and stability to the dryer body.
The base of the lattice is made of metal pipes with a cross section of 1.6 cm (external). The folding support holding the frame is constructed from the same pipe.
For the manufacture of the frame and the body of the dryer will require several hinges that can be made of steel pipes. For the stand will require hinges with a diameter of 18 mm. For the manufacture of the lattice need hinges with a diameter of 16 mm.
 Stainless steel wire
The grill itself is made of rods, the material for the manufacture of which is stainless steel wire section of 3 mm, cut into pieces with a length of 67 cm. From both ends on each rod M3 thread is performed. Using nuts as fastenings on 2 on each of the sides, we connect rods to the frame of the grid. In total, 6 rods are fixed with a 6 cm indent from the frame pipe.
The assembled dryer should be painted. A layer of paint will protect the steel structure from the formation of rust and rapid wear, which will inevitably lead to periodic interaction with raw things. Before painting, the surface must be cleaned and degreased using acetone or solvents. Then a special primer is applied in 1-2 coats. Experts recommend applying metal enamels or automotive paint to paint dryers. The coloring composition is applied in 2-3 layers.
 Production of the wall-mounted dryer
The mobile design can be used in any room: in the kitchen, on the balcony, in the bathroom. It moves easily from place to place, and when assembled it does not occupy much space.
Dryer for loggia
 On loggia
The wall clothes dryer should be it is made so that the ropes, on which things are hung, do not sag, remaining always strained. This can be achieved by applying the effect of the work of the built-in springs. Each of the ropes is securely fixed on one side of the loggia, and the free end, passing through the spring, is mounted on the opposite side. The design uses standard furniture springs whose diameter is 1.52 cm.
The dryer will consist of four ropes.To fix the rope on one of the walls, a piece of stainless steel tube having a diameter of 2–3 cm and a length of about 50 cm is required. The length of the tube depends on the expected distance between the ropes. In this case, it will be 15 cm. It is at a distance of 15 cm from each other in the tube that you need to drill through holes into which the end of the rope, previously tied with a knot, will be passed. On the wall, the tube is fixed with the help of brackets, the material for the manufacture of which is a wooden bar of 6 * 8 cm. But the ends of the rope pass on top of the tube and are securely connected to one edge of the spring, the second edge of which should be fixed on the wall of the loggia.
Algorithm of performance of work:
- The slots for mounting metal tubes are drilled in the brackets.
- In the through holes of one of the tubes, ropes are skipped, the ends of which are tied with a strong knot.
- The tubes are securely fixed in the brackets.
- The free end of each of the ropes is passed through the top of the tube fixed on the opposite wall.
- The spring with a free edge is fixed on the wall with anchors.
- Slightly pulling each rope you need to connect it with a spring and fix it with puffs.
Having checked the functionality and reliability of the design, it is desirable to decorate the springs and components. A piece of a laminate, hardboard, plywood, as well as a wall panel, a picture and so on can become an element of decor.
Making the dryer in the bathroom
 For the bath
You can make a special tool for drying the laundry to be applied to the bath. This will require several bars 2 * 2 cm. A couple of bars need to be put on a bath 50 cm apart. They will be the basis for laying and fixing cross-beams made from the same beam. On these cross beams and we will subsequently hang clothes.
The length of the bars is adjusted according to the width of the bath itself. Typically, the width of the sanitary device is 70 cm. All wooden elements must be carefully treated with emery paper and then painted or varnished. The dryer simply fits on board the bath. In this case, the lower bars will be the basis for the upper bars, as well as a kind of limiter, which will fix the device on the bath, not allowing it to move under the load and fall.
Video
Clothes dryer of the original author's design:
Search
Related Articles
How to use a sealant gun
Nowadays, the building materials market is so diverse that everyone will find what they need, both in quality and price. One of the most used materials in construction is sealant. With it, you can p...
House made of brick with his own hands
As you know, every man must do three things in his life. One of them is to build a house. This is a very crucial stage, which requires certain knowledge and skills. In order to realize your dream, y...
How to cut the thread on the pipe with your own hands
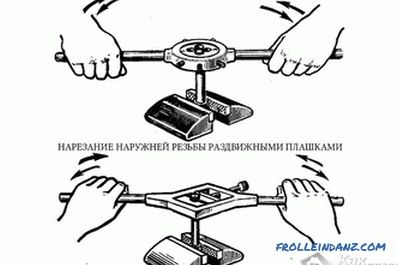
Independent threading on pipes of a different class requires from the performer certain skills and knowledge of all the subtleties of this procedure. In this article we want to acquaint you with how...
What to do if the sewage system is frozen

Great inconvenience can cause ice jams that have formed inside the sewer pipes, in this case, you can not fully use the water in the house. The problem of freezing pipes must be solved quickly. Sinc...
expert advice (photo and video)
Restoration of a coffee table on your own is quite painstaking, but not very difficult. If you become familiar with the technology, take into account the advice of experts, get quality materials, y...