Atmospheric precipitation is a natural phenomenon. Snow and rain fall on the roof, and then all this water flows under the foundation. As a result, the building may be significantly damaged. To avoid this, water must be discharged. For this, a special sewer system is created, we will tell you about it in this article.
What is a storm sewage system
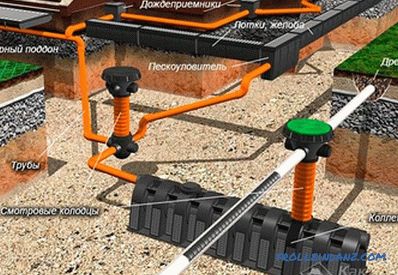 Layout of the drainage system of a private house
Many believe that stormwater is pipes that come from the roof of houses. This is not entirely true. Drain is part of this system, but not the most important. If it is divided into parts, then this will include:
- drainage system from the roof of buildings and structures;
- catchment elements (storm water basins, trays, etc.);
- sewer pipes, water will be discharged from the site;
- collectors;
- inspection wells.
All these elements together make up a common system.
Types of storm sewers
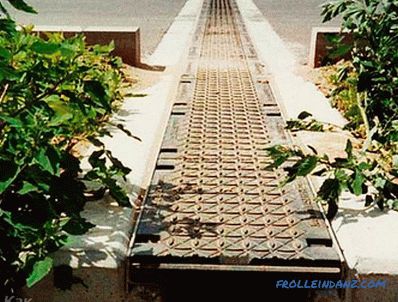 Open-type storm water
There are two types. The first, open, is used in the event that the amount of precipitation is small. It is a system of gutters and trays, which are connected in one ditch. With this system, you can divert water from small areas.
A closed system is considered to be more powerful. In this case, various elements of the catchment are used, from which water (along pipes laid underground) is diverted from the site.
Whatever system you install, it will serve well, especially in places with a lot of rain. Such sewage not only makes life more convenient (there will be no puddles and dirt on the site), but also helps to cope with many problems. First, by removing excess water, you protect the house from washing away. The foundation and walls will not be flooded, which means that they will last much longer.
Secondly, there will be less frost on the paths near your house, and this will increase safety. Also, the removal of excess moisture (especially in areas with a slope) will not allow soil corrosion.
We design the system
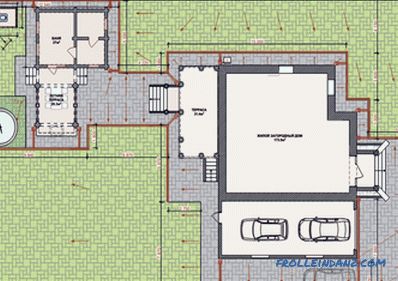 Sewerage project
Before the start of construction it is necessary to make a project . And for this you need to collect some information. First of all it is necessary to find out how much precipitation falls at the location of your house. Also collect information about the type of soil, how deep the groundwater lies, etc. All this information can be found in the building directories or (if possible) in the architecture department of your settlement.
Secondly, you need to calculate the slope on your site. That is, find out in which direction all the water will flow. Another important fact that you should know is where you will divert the collected water. There may be several options:
- to the central sewage system,
- to a natural or artificial reservoir;
- to a septic tank with equipped filtration fields;
- in the drainage well.
Knowing all this data, you can plan everything. You should also read this document, as a SNiP 2. 04. 03-85. It lists all the requirements for the installation of the outdoor system. They should also be considered.
What materials and elements to use
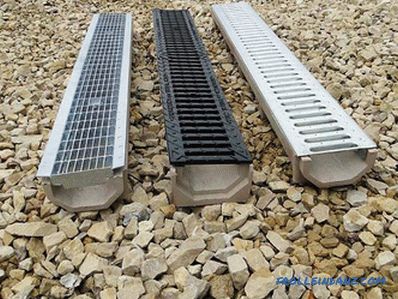 Concrete chute
Before talking about How to make a shower, it is worth talking about the elements used and materials for their manufacture. The system of such sewage system is a kind of pipeline that must collect rain and melt water and take it outside the site. Therefore, a significant part of this system consists of pipes. Special demands are made of them:
- Sufficient strength. Since they will be in the ground, they must withstand heavy loads with a margin. And both external and internal.
- Resistant to aggressive media. Rain and melt water will flow through the canals, which may carry with it various reagents and chemicals, all of which pipes must withstand.
- Portability of temperature changes. The system will be outside and must withstand both summer heat and winter frost.
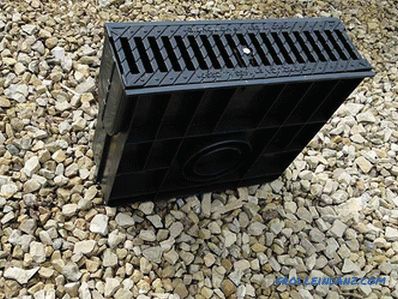 Sand trap for connecting the drainage pipe
In addition to the sewage pipes themselves, the system described also includes a number of items. Their installation is optional and is made as necessary. These elements include:
- Storm-water inlet - a structure that will collect water from the drains of a building.
- Rain Well . It is necessary to connect the gully (which is located close to the surface) to the pipes.
- Trays for collecting precipitation. They are stacked in the places of their greatest accumulation.
- Sand traps . With their help, you can easily clean the system.
- Siphons, plugs, etc.
If we talk about the materials used, then you should pay attention to the plastic. It is quite durable and not subject to the harmful effects of the environment. Plastic pipes and other elements perfectly cope with the discharge of water from the site. If it is necessary to lay the system under the road (for example, if the spillway is far from the site), then it is advisable to choose a more durable material. In this case, asbestos-cement or reinforced concrete pipes are often used.
Installation of the system
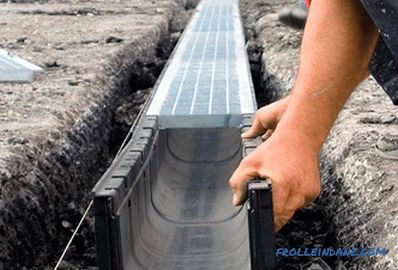 Installation
After collecting all the necessary information and making a plan , you can proceed to the installation of the system. The first thing we do planning on the ground. Mark up the installation location of the elements of the catchment. We note where the pipes will pass.
As a result of this work, you should have a unified system. From all structures, which will fall precipitation, should drain sewer pipes. According to them, the water will drain into the place of abstraction.
Pipes are laid in trenches. It is desirable that the depth of their occurrence was below the level of soil freezing. If this does not work out, it is necessary to provide insulation.
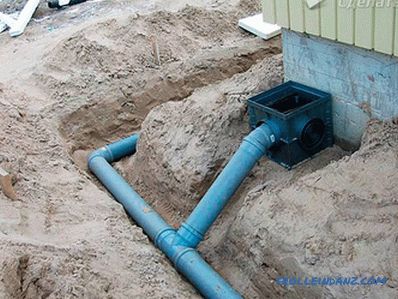 Pipe laying
When laying pipes at the bottom of the trench, a pillow is created. It is made of a 10–20 cm thick layer of sand. With this pillow, you need to create a small pipe slope. It should be at least 2 degrees. The bias is done in the direction where the discharge point is located.
To prevent the accumulated garbage in the basket from entering the drain pipe and the unpleasant smell in the yard, each catchment point should be equipped with special partitions-siphons.
 Partition-siphon to the inlet Installation begins with the installation of drain inlets (if you already have a drain system installed). From each of them the pipe must lead to the general system. Also, trays for collecting water and other elements of the catchment are connected to the main pipe. Also in the system, the presence of sand traps and plugs is desirable. The first ones make it easy to clean the system, while the latter will not allow water to flow in the opposite direction (in case of clogging).
If the site provides for the installation of a drainage system, the pipes can be laid with it in one trench. But this does not mean that one of these systems can replace the other. They have different functions. The stormwater removes excess water from the surface, and drainage pipes do not allow groundwater to damage the foundation of the building.
As a result, the main pipe should end with a place of discharge. It can be either a reservoir, or a ravine, or a common sewage system. But often in suburban areas establish a drainage well or septic system.
Video
Installation of pipes and drainage of the site and foundation
