The gate is an integral part of the protective construction of the suburban area. Today, there are many varieties. Let's consider the process of manufacturing and installation of sliding gates with their own hands.
Advantages and disadvantages of this design
 Advantages and disadvantages of
Advantages:
- This design of the gate does not interfere with the exit / entry of the vehicle in a small site. Cantilever gates save space.
- The presence of the lower fixture of the cantilever system makes it possible to equip the gate in any climatic conditions.
- Finishing can be made of different materials, for example, vertical lathing, sheeting, forging and more.
- Possibility to choose a design variant, for example, from a sandwich panel or profiled sheet.
- In comparison with other types of gates (for example, swing), there is no such thing as sagging loops. Available automation and gate closing / opening mechanism provides for a long operational period.
- It is possible to choose different automations for the gate.
Disadvantages:
- Unlike other types of gates, for example, hinged, retractable gates require more financial expenses, approximately by 10-20%.
- For fixing the console part and the drive, it is necessary to produce an additional foundation.
- Along the fence you will need to allocate sufficient space.
Construction types

The door structure is divided into several types, each of which is different from each other:
- Suspended. Since Soviet times, this heavy, but at the same time reliable construction has gained immense popularity. In it, the canvas on roller carts is attached to a beam, which is located above the passage, up to 5 m in height. As a result, this height is a limitation when driving tall cars.
- Console. This type of gate is ideal for the climatic features of Russia. This design is not equipped with a beam above the passage. Such gates will not be able to disable snow drifts, wind, dust, and the like. So, the cloth is fixed to the beam with the help of roller carts. In this case, the entire structure is fixed on a powerful foundation, which is poured on the side of the opening.
- On screw piles. To a depth of 1500 mm metal piles are twisted into the ground, which will be the carriers of the entire structure. Their manufacture and installation will take up to 3 days.
- Mechanical. Such gates are opened / closed manually. Mechanical is much cheaper in cost and easier to install. They are suitable for those cases if the cottage or a country house is rarely used.
- Automatic. Such gates are the exact opposite of mechanical. They are equipped with electric and remote control. For regular use the best option.
Regardless of the type of construction, sliding gates require free space along the fence on one side. At the same time it should be equal in size to the opening. As for the console systems, the place should be more by 120-200%.
Features of the calculation of the gate
 Features of self-calculation
Design calculation one of the most important and priority stages. Ignore this stage is not worth it, since the construction of recoiling is much more difficult than swing.
The calculation process includes the following steps:
- Determining the height and width of the opening. As a result, it will be possible to choose the necessary type of gate for free movement.
- Calculation of the counterweight.
- Estimation of the weight of the structure under construction.
- Sketching or drawing.
The calculation of the width and height of the structure should be repelled from the market mix. So, if a profile or a pipe can be easily welded, then cutting the sheets of corrugated board is very difficult to add. Plus, the result will be unaesthetic.
 Sliding gate calculations
Moreover, understanding how much weight the structure will be in the final account, selected mechanisms and moving parts that can cope with the load.
If the canvas is supposed to be large, then be sure to consider the wind load. To the existing wind force prevailing in your area, add a small margin.
Although the easiest way to get a calculation is to contact a specialized company that provides a folder with drawings and calculations, you can do it yourself. It is worth noting immediately that all the above calculations relate to cantilever-type sliding gates. They are harder on all other types, so consider them in more detail.
The data of the height and width of the opening

The width of the door (L) will be:
- the width of the opening;
- technological indents of opening / closing;
- minimum distance between the centers of the carriages.
On the basis of this L there will be more openings.
Calculation of the counterweight

When moving, the valves should be balanced. This indicator is achieved by calculating the counterweight. Due to this, the specific gravity of the structure will be evenly distributed throughout the carriages. Accordingly, in order to make the load as small as possible, the counterweight must be large.
But what if there is not enough space for the movement of the sash? In this case, you must understand that the length of the counterweight should not be less than 40% of the width of the sash. The ideal rate is 50%. As a consequence, the width L in its design has a counterweight.
With such calculations, you can determine how much space is needed to roll the gate along the fence.
Weight calculation

This value is determined based on the weight of the material used:
- Sheeting ~ equals 4 kg / m 2 .
- Steel, 2 mm ~ 17 kg / m 2 thick.
Gates with a 4 * 2 m frame will have an average weight of 200 kg. Having such data, you can determine the performance of the guide beam. In this case, you can build on the standard.
For a gate weighing 300 kg, a beam of 9 * 5 cm and a thickness of at least 3.5 mm is sufficient. However, a safety margin of up to 40% is required. It will greatly simplify the operation of the gate and increase its operational life.
Calculation of the strength of fittings

The gates will need rollers, catchers and support tire. Modern products of such a plan allow you to choose the necessary design. We take the simplest wind load estimate, which is 12 m / s up to 90 kg / m 2 and is evenly distributed over the supporting zones of the canvas.
How to make sure that the structure made by you will work without interruption even in strong winds? For this, it is necessary to achieve that the strength of the fittings is greater than the calculated gate weight. It also takes into account the lateral moment of 100 kg / m, multiplied by 8 kg / m, which equals 800 kg / m. In principle, this is a little ~ for each supporting element 150-180 kg / m.
When buying a roller mechanism, make sure that it has a margin of up to 30% in relation to the weight of the gate. But this figure does not affect the life. This is directly affected by increasing the distance between the centers of the carriages.
Additional calculations

In addition to all the above, attention should be paid to other aspects. Pay attention to the rail for the gate, supports for roller carriages and the number of anchors. It is also important to correctly calculate the mortgages on the support pillars. In this case, it is necessary to build on 60% of the total mass of the gate divided by the number of mortgages.
As for the calculation of the foundation, there are no special secrets here. But despite this, you should not lose sight of this component, because often the cost of the foundation reaches 40% of the total project cost.
Sliding gate device

This type of gate has the following structural elements:
- Guide rail. It takes on all their weight.
- Trolley or roller bearing. They need 2 pcs.
- Removable end roller. In the closed state, it serves as a support.
- Upper / lower trap. The bottom one with a closed gate takes the load, while the top one reduces the sail area.
- Bracket. It is important for keeping the sash from lateral swing.
- Stand. It is installed on the support, which organizes the movement of the sash.
Roller bearings are installed on the foundation, which take up the load of the guide beam. The rollers are placed inside the carrying console.
Selection of the leaf
 Sliding gate door
High doors are also presented to the gate leaf requirements. Its structure must be sufficiently rigid and stable. It is important that in case of a strong gust of wind or ice, the flap functions well. Moreover, it is necessary to equip it with additional stiffening ribs so that it does not sag under its own weight. All this should be considered when creating drawings.
Selection of accessories

The presence of various components directly depends on the height and width of the leaf, as well as its weight. So, today on the market you can find a number of companies that provide quality equipment, namely:
- Combi Arialdo and Flatelli Comunello from Italy.
- Roltek and Doorhan from Russia.
- Alutech from Belarus.
For example, we will make some calculations. In the basic configuration, a carrier rail must be installed, 6 meters long. And in order to choose the right components for it, you must take into account the length of the sash and 40% plus. Also selection is carried out along the length of the guide beam and possible loads. So, if the opening width is 3.8 m, then the length of the gate is 3.8 m + 40% = 5.32 m.In this case, you can purchase a ready-made set with a beam of 6 m.
If the opening width significantly exceeds 4 m, then the purchase of components should be oriented taking into account the load of 500 kg. In them, the guide beam has a wall thickness of 3.5 m, and a section of 71 * 65 mm. If the width is more than 6 m, then it is necessary to take from the calculation the load up to 600 kg.
Installation work
 Installation of sliding gates
The web movement should carried out from the inside of the plot, namely along the fence. Based on this, it is necessary to prepare a place for the gate, so that absolutely nothing would interfere with this process.
The installation process includes 4 steps:
- Making the foundation.
- Electrical wiring.
- Installation of the response post.
- Installation of automation.
Production of the foundation

Stages for the construction of the foundation:
- The marking is carried out first. You measure 500 mm from the fence (foundation width). Also measure the distance from the gate edge equal to the recoil (the length of the foundation). So, you will see the perimeter of the future foundation.
- Often it turns out to use the pillars of the fence support. If this is not possible, then a counter pole should be installed on the opposite side. It must be installed so that it is inside the site, and not in the opening. Otherwise, it will reduce the width of the opening.
- If the gate works on automation, be sure to arrange a place for wiring. For this you can use a square metal or plastic pipe / box. The diameter of the pipes is not less than 25 mm.
- Now you can start digging a pit. The depth of the trench is up to 2 m, below the level of soil freezing (in each region differently).
- For the manufacture of the embedded element, you can use channel 16. Its length should correspond to the length of the trench. The foundation is laid reinforcement Ø12 mm. The armature must be welded to the channel and be connected by cross links.
- Thus, the resulting mortgage element is placed downwards with the reinforcement. When laying, make sure that the side of the channel is adjacent to the fence post. Also, the channel must be set strictly on the level and exactly parallel to the line of opening the gate.
The embedded element must be flush with the road surface. The minimum clearance that is allowed between the lower edge of the gate and the road is 10 cm. This gap can be increased by means of an adjustment platform. But to reduce this gap will be impossible without breaking the bindings.
 Mounting the mortgage
If for one reason or another a gap of 100 mm does not fit , then make a deep installation of the embedded element.
As for the concrete work, they are carried out when the installation of the mortgage element is fully completed. The level of concrete must be flush with the mortgage element.
Installation
 Installation of the gate
When the foundation is frozen, you can start installing the gate. To do this, first of all you need to make markup. On the line of the opening, not reaching the counter post of 30 mm, pull the cord. This cord is the trajectory of the gate movement. Cord tensioning height - 200 mm. Further work is as follows:
- Determine the extreme position of the first and second roller bearings. From the edge of the opening, retreat 15 cm along the plane of the embedded element and draw the position line of the extreme first carriage Calculate the line of the second carriage as follows: measure the entire length of the gate with the cantilever part and subtract 10 cm from the edge of the counter column along the plane of the mortgage element. As a result, you determine the location of the second cart.
- Now insert the roller bearings into the support profile, placing them in the center.
After it is necessary to weld the second carriage of the adjustment platform. Then roll out the door leaf in the opening and make the final adjustment of the position. Make a small tack welding of the second adjustment platform, as a result of the action look like this:
- Remove the canvas from the roller carriage.
- Next, remove the carts from the pads.
- Weld the pads to the embedded element.
- To them fix roller carts.
- Push the canvas on the roller bearings.
- Close the gate and use a wrench to adjust their position.
 The drive of the sliding gate
Perform holes in the supporting profile, this is necessary in order to install the cart correctly. To do this, loosen the upper nuts attaching the carts to the platforms. After that, roll the gate back / forth. If the sash is free, tighten the nuts. If there are some difficulties in moving the sash, the fasteners slightly loosen and level up all the design flaws, for example, correct the carriage distortions.
 Installing the rollers
- Now you need to install the end roller. It should be inserted into the support profile and carefully tighten the bolts. Also weld the end roller cover to the profile. This will allow the roller to play the role of the end stop in the case of manual control of the gate. But in this case, the fastening by welding will be much better than the bolt.
- As for the carrier profile plug, it is mounted from the inside of the door and welded in place. It is necessary so that the snow does not roll under the rollers.
- Now the upper retainer is mounted to the rollers. Therefore, loosen the fasteners of the rollers and install the brackets so that its side is facing the support pole and the rollers grab the top of the canvas. Considering this, press the bracket to the post and fix it.
At the next stage of work, the door frame is trimmed. For this you can use profiled sheets of metal. They must be cut to size of the sash. Fastening is carried out by rivets or screws. Each subsequent sheet is mounted overlap.
 Cart
Cart
When the casing can be completed, you can install the bottom / top trap. The lower catcher performs the role of reducing the load on roller trolleys in the closed state. Therefore, they must be installed with a loaded gate. Place the lower catcher under the end roller with the gate completely closed so that the catcher's reference plane is higher than the level of the end roller. As for the installation of the upper trap, this process takes place in the same way.
 Traps
Traps
At the end, it remains to install the automation. To do this, fix the rack rail, which implies a universal part with electric drive. Usually it is included in the fastener kit.
Choice of automatics

The choice of automatics directly depends on the weight of the gate:
- For the opening in 4 m the drive is used - 500 600 kg.
- A drive of 600–1300 kg is used for an aperture of 4–6 m.
- A drive of 1200–1800 kg is used for cases with intensive opening of the gate.
Paint
 Door Color
All metal elements of the gate are necessary to paint. Pre-degrease the surface. To do this, clean the surface and grind with a grinding wheel on the grinder. Some places, for example, protected, wipe with acetone. Now you can proceed to the primer. It is applied evenly. Moreover, the primer should be applied in such a way that there are no drops and streaks. Thanks to such preparatory work the paint will fall evenly. As a result, the entire structure of the door will be completely protected from the appearance of corrosion.
Paint should be applied in two layers and only after the first one has completely dried.
Necessary tools for work

For all the work, you will need to have such a tool:
- Inverter welding material. Such a unit will not spoil the metal.
- Bulgarian.
- Air compressor for painting.
- Passatizhi.
- Drill.
- Roulette.
- Level.
- Riveter.
Common errors

If you do not have enough experience in performing such work, then there is a big risk of making certain errors:
- Insufficient foundation preparation.
- Incorrect installation and fasteners of all components.
- Incorrectly selected weight of the gate under the carrier beam.
- If creaking is heard, then this is evidence of sand getting into the bearings.
- It is impossible to allow stains of paint.
- Be sure to note the depth of soil freezing. Otherwise, the pillars can twist in one of the sides.
Video: production of the gate
Photo: ready-made sliding gate options
 Automatic forged gates
 Automatic sliding gates
 Wooden sliding gates
 Forged
 Beautiful design of the gate
 Mechanical
 Metal
Metal

 Sliding gates at the cottage
 With automatic
 With the built-in wicket
 View from the yard
 Street sliding doors
Schemes
On There are quite a few constructive details for the manufacture of sliding gates:
 A drawing of the gate for 4 meters
 Construction
 Methods for securing sliding gates
 Assembly drawing
 Sliding gate layout and opening
 Completion
 Base under the gate
 Preparing the opening
 Construction scheme
 Installation of columns
 Mortgage system
Search
Related Articles
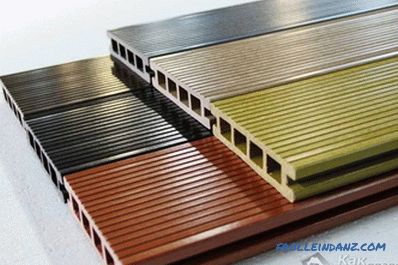
Laying decking boards do it yourself
Nowadays innovative technologies allow creating analogs of various natural materials. The quality of the finished product is so good that it can easily replace the original. For example, decades ago...
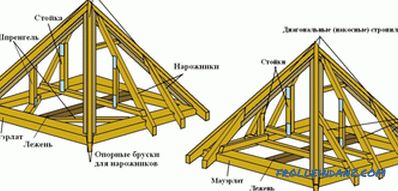
Installation of rafter system: step-by-step instruction of the roof
The process of installing the roof truss system begins with the preparatory work. Reliability and appearance of the roof depends on the quality of the installation of rafters. The device raft...
Loft design in a private house

Most often, the attic is used to store old and unnecessary items, tools, supplies that are not used, and it is a pity to part with them. But when the house is already equipped, then due to the growi...
Wooden pool do it yourself - how to build
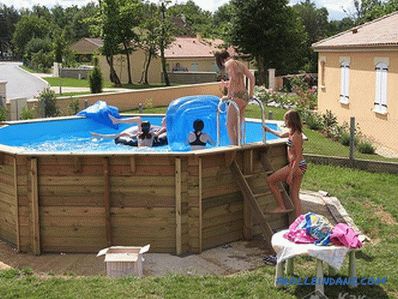
If you make a wooden pool with your own hands at a dacha or near a house, then you can take water treatments on a hot summer day just by going beyond the threshold. The advantages of this solution...
ideas, recommendations and photo examples

Think for a moment about using a cheerful color in the interior, and the first room in the house, which at this moment will come to your mind, will surely be a children's room. This is an ideal plac...