Without chairs, no modern house can be imagined. These pieces of furniture can be purchased or made independently. Before you make a chair with your own hands, it should be remembered that at the heart of the model, which has a straight back and a soft seat. Wood will be the main material for the construction. It can be dry pine, devoid of knots, it can be beech or, for example, oak. The last 2 breeds are quite difficult to process, however, the result will be better.
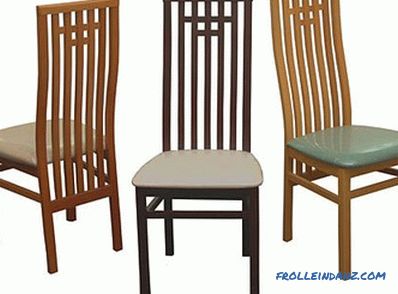
It is better to use dry pine or oak to make a chair.
For work it is necessary to prepare a bar with the following dimensions: 40x60 and 40x40 mm. The edging board should be presented with material with dimensions equal to 400x480 mm, which should be used for sitting, and 100x420 mm for the backrest. The board should have a thickness equal to 10-15 mm. Timber can be planed. There is on sale and one that is subject to processing, it can be brought to readiness independently, using a plane and sandpaper for polishing. For the implementation of coarse polishing, you can use paper No. 100-120, but the gloss is recommended to achieve the method of using paper with a number of 220 and above.
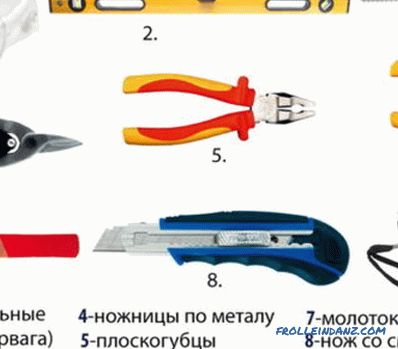
Tools and materials
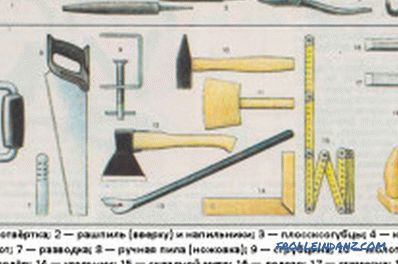
Tools needed to make a wooden high chair.
- timber;
- saw;
- board;
- foam rubber;
- chisel;
- thick fabric;
- screws;
- sandpaper;
- glue;
- plane;
- construction stapler;
- screw clamps.
The process of assembling a chair
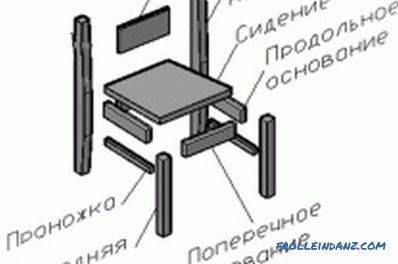
Figure 1. Diagram of the detailing of a chair.
The manufacture of the chair should begin with cutting four bars, two of which should have a length of 800 mm, and a cross section of 40x60, which will go to the workpiece under the rear legs, another two should have a length of 440 mm while their cross-section should be equal to 40x40, these blanks will be used for the manufacture of front legs. In fig. 1 is a diagram of the details of the chair.
The front legs will have to equip grooves designed for the longitudinal, transverse bases and progres. The grooves of the bases and prozhek should be located on the same level. What bars should be folded together so that their ends of the lower part of the legs coincide. Then, using a pencil, you can mark the grooves. The dimensions of the grooves should be as follows, 20x40 mm, their depth should be equal to the limit of 15-20 mm. The inner edge of the grooves should be removed 10 mm from the inner edge of the element.
Grooves intended for the base should be equipped with 2 for each element. The grooves need to equip on adjacent, but not opposite faces of parts. After mounting the base will form a rectangle with the tops in the form of legs.
The grooves need to be equipped with the chisel itself, simultaneously relieving the internal space of sawdust. The rear legs can be made slightly improved.
For what, from the upper groove to the top and from the lower groove to the bottom of the element, you need to cut the edge, providing a transition that will be located from 60 to 40 mm.
Seat attachment scheme.
On this we can assume that the legs are ready, now you can begin to produce 2 progres and 2 longitudinal bases by cutting off four bars, the length of which is equal to 350 mm, and the section - 40x40 mm. With each end you need to make markup, putting 10-12 mm, this will get spikes. Cut the spikes allow a chisel and a hacksaw. By the manufacture of thorns should be treated with special care: they must match the grooves that will fit into them, without the formation of gaps.
You can make a chair, following the sequence of work. At the next stage, 2 bars are to be cut off, the length of which is equal to 420 mm, and the cross section - 40x40 mm. These blanks will be used for the manufacture of transverse bases. On these blanks to equip the same spikes.
When making a chair, you need to make a back, for which it is preferable to use a trim board. This element will have a length of 420 mm and a width of 80-100 mm. The inner edges of the rear legs in height must be provided with grooves that will have an appropriate width. They will need to start back.
You can make a chair with your own hands by using self-tapping screws, which will strengthen the seat to the underside. For a more comfortable fit and provide additional rigidity between the bases, you need to add bracing, which will become small in size.
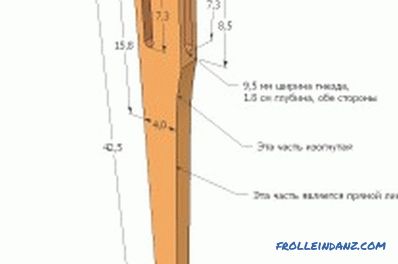
Diagram of the legs of the chair.
The legs of the structure from the outer edge and the back on both sides need to be rounded off first, and then ground. Before you make a chair, you need to prepare the varnish, which is supposed to cover the finished product. Do not forget about the implementation of polishing. It should be borne in mind that many varnishes have a sharp unpleasant odor.For this reason, it is better to paint the structure outside the living space. If you are thinking about the question of how to make a chair with your own hands, then you should get varnishes that are odorless and water-based.
You can also make a chair with your own hands more comfortable. To do this, in the process of drying lacquer, you can do it with refining using foam rubber, which should be given the appropriate size of the seat. For a more aesthetic appearance of the chair, foam rubber is preferable to give a slightly smaller size in relation to the surface on which it is supposed to be fixed.
Foam rubber should be covered with upholstery fabric, and then carefully fix it underneath using a stapler.
Final Works
As soon as the structural elements are dried, a chair can be assembled from them. Pre-thorns to be treated with glue, hammering with a wooden hammer, which is also called a mallet. If such a tool is not in the arsenal of the master, you can replace it with a steel hammer, the working part of which should be wrapped with a soft cloth. The main goal when working with it is to avoid damage to the lacquer coating. The back and seat can be fixed with screws.
Such a chair can be installed in any room of a house or apartment, from the living room to the dining room. If necessary, such items of furniture can be added to the nursery. However, for this chair must be of appropriate size. In order to make a chair for a nursery, you should prepare a sketch with smaller dimensions than those considered in the example. To make a chair simply with all the tools and quality timber. The material at the base of the construction must be well dried - otherwise, after it is possible to make a chair, it will become deformed and become unusable. That is why it is possible to make a chair by purchasing a high-quality timber and lacquer, which can protect it from external influences of a mechanical nature.
Didn't find the answer in the article? More information on the topic:
-
High-quality furniture from shields with your own hands
Furniture from the boards with their own hands. Preparatory work. Full production of a bed from the first to the last step. The time after which you can begin operation.
-
Installing the ceiling from wooden slats
The ceiling of wooden slats, its features and types. Dimensions and classes of wooden slats. The procedure for installing the ceiling. Tools required to install the ceiling.
