Shelving at all times was of great interest. This is quite a convenient thing that can be used to store various things, books. You can also put on high racks and pots with low plants that will look quite nice.
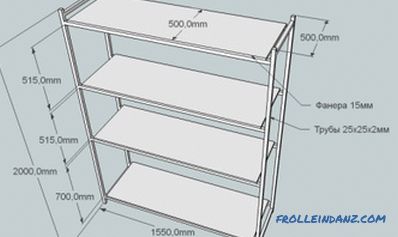
Figure 1. Drawing of a wooden rack.
It is not so difficult and hard for almost every person to make a wooden shelving with their own hands. It is only necessary to prepare everything necessary for work in advance. To date, there are many options for racks, different in design. But below we consider one of the most simple and practical options.
Materials and tools for work
Before embarking on the process of making a wooden shelving with your own hands, you need to choose the right materials and tools.
As a base material, it is advisable to choose boards from natural wood. For such a purpose is best suited oak, pine or mahogany. It is not recommended to use wood chip boards, as they will not be particularly durable and practical. At the same time make sure that the moisture content of the wood does not exceed 12%. Also, before work, the wood is treated with antiseptics and special impregnations, after which it is given a couple of days to lie in a warm room. In addition to the boards, for the rack you will need:

Tools for making a wooden rack.
- tape measure and pencil for marking;
- self-tapping screws;
- grinder;
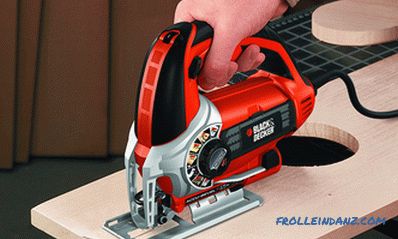
- electric jigsaw;
- varnish for wood;
- hammer;
- wood glue;
- metal corners;
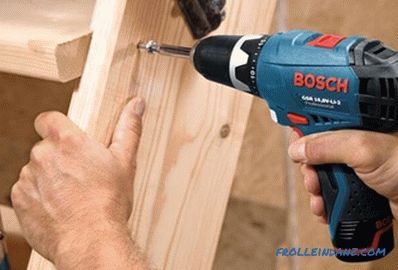
- drill;
- plywood;
- furniture legs on wheels;
- varnish and brush;
- wooden blocks for transverse fixing of shelves;
- holders for shelves.
Preparation of the base, walls and shelves
We begin the work with the choice of the lower base. As such, a thick board is taken (the thickness must be such that a self-tapping screw 3 cm long will freely enter it). At the same time, its length is equal to the maximum length of the rack, and its width is its maximum width, which you choose yourself. In this case, it is advisable to nail the transverse bars, the length of which is equal to the width of the base, through each meter of the length of the rack at the bottom of the base. They will provide an additional fortress.
Now go to work on the side boards. If you have limited material resources, then instead of natural wood you can use thick plywood for the sides. Immediately mark it so that the width is equal to the width of the base, and the height of the boards is chosen independently. Next, cut out neatly side edges of the desired size. Immediately do on their inner side markings for shelves. It should not be forgotten that the optimum figures for the height of the shelves are 21 and 42 cm. These two heights can be combined. So you get the shelves at the same time and roomy, and quite neat.
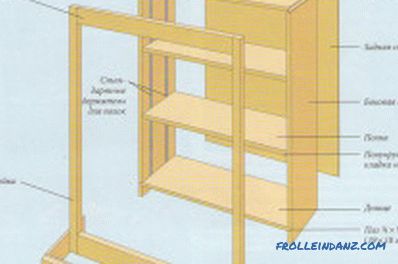
Rack Assembly Diagram.
Now go to cutting the shelves from the tree. Their length is measured from the inside of the rack so that they simultaneously and freely and tightly fit into the rack. The width is equal to the depth of the cabinet itself. The thickness of the shelves in the ideal version should not be less than 2.5 cm. But it is still better to fix them in transverse bars below. Bars can be nailed with the usual small studs.
Next is the time to take up the back wall. As a rule, if you are satisfied with the color and texture of the wall to which the cabinet adjoins, then you can also not mount the back wall. But if it is necessary, a wall is cut from ordinary plywood, based on the dimensions of the length and height of the rack.
Build a rack with your own hands
So, all the necessary structural elements are prepared. Now the most responsible - the assembly of a rack of wood in a single structure. It is best to use several different types of fasteners: and screws, and wood glue, and nails, and metal corners, if necessary.
Shelf mounting options
First, the lowermost shelf is taken for the base, to which the rear wall of the rack is attached with self-tapping screws. If such a wall is not provided by you, then immediately start working with the side walls. From the inside, you have previously made markings for shelves.
So now on each of the markings parallel to each other it is necessary to fix special metal or plastic (depending on the intended load for the shelves) holders on which you can put wooden shelves. Further, these sidewalls are mounted to the lower base with screws. Do not forget to observe the evenness of all angles. For reliability, it is even better to use metal corners as fixing elements.
But this was the first shelf option. There is also another - a solid mount. Here you do not need to do the holders.In this case, the shelves will be directly connected with the sides. To make everything correctly, first attach the side walls to the base with self-tapping screws, after which one person should hold a shelf inside the rack by marking and fasten it with the outside part of the sidewalls with self-tapping screws. From under the bottom of the shelf it is advisable to additionally fix all the same corners of metal. But keep in mind that this method is a bit more complicated, since it requires perfect measurements of the length of the inner shelves, as well as more time and attention to work. Any misalignment can ruin the rack. Therefore, immediately use more and construction level.
Some additional tips.
So, the main part is ready. Now it remains to secure the top of the rack from the top, which will give the rack a finished look and protect the uppermost shelf from dust on it. Fastening is carried out using all the same screws.
Making a rack (in particular, during the assembly process) will be more reliable if, after drilling the holes for the screws, you place them inside with wood glue. This will provide additional reliability. As legs for a rack it is best to use furniture legs on castors. And it will be much more convenient to move the structure, if necessary, and it can withstand any loads without provoking distortions.
Rack of wood with your own hands is ready! Its main part will look approximately, as in fig. 1. This simple and practical at the same time design is suitable for any room: for the kitchen, bedroom, hall. Now you just have to cover the rack with wood varnish and let it dry properly.
Didn't find the answer in the article? More information on the topic:
-
How to make wood veneer?
Information on how veneers are made. Three ways of industrial manufacture of veneer. Making veneer your own hands. Finishing veneer of various surfaces.
-
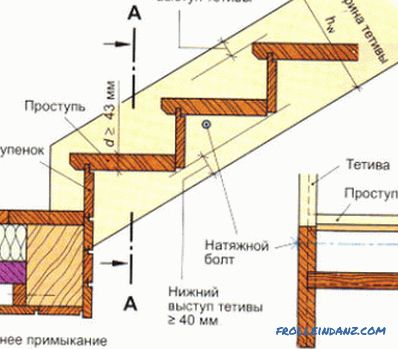
How to build a wooden staircase
Information on how to build a ladder yourself. Parameters of the riser, tread, step, work on the assembly of the structure. Installation of stairs and installation of railings. Finishing the stairs.
-
How can I make a box with my own hands?
Step by step instructions on how to make a box with your own hands. Necessary for work tools and materials. Marking and pattern details. Manufacturing retractable design.
