It is difficult to say for sure when the first products that were made of wood appeared. But it is safe to say that the first objects from the tree were idol symbols. They represented the image of beasts and heavenly bodies. Such products were often talismans. Today, this craft has been preserved and you can find a lot of wooden souvenirs on the market.

A wooden shelf with its own hands serves not only as an element of decor, but also for household use.
A variety of crafts are made of wood, even those that can be compared to a lace object. Often enough of this material make household items and decor, carved furniture.
A bit of history
The deepest roots belong to the artistic carving, its main sculptural trend. We all heard stories that mentioned ships with carved figures on the nose. They were talismans for mariners. And it is not surprising that the sculptural technique of carving has a "marine" origin, only then it appeared on land.
At the end of the 19th and the beginning of the 20th centuries, the main direction was such an activity as carving. It was used to design the facade of the house. Had expressive features and "airiness".
Material for products

Proper positioning of the hands when sawing with a jigsaw.
The artistic value of the finished product depends on how correctly the tree species is selected.
Here is a list of the most popular wood species:
- Linden. It is quite easy to handle cutting tools, as it is soft. It is used to make ornaments, small plastic and various sculptures.
- Aspen. According to its characteristics similar to linden.
- Birch. Excellent served polishing and staining. It is used in the manufacture of furniture.
- Pine. Products look very beautiful, if you arrange the tree rings symmetrically.
- Oak, ash. Wood looks very impressive in large pieces. Especially valuable is the one that has lain for a long time in the water, it is also called stained oak.
- Alder. The wood has a pleasant pinkish tint. Perfect for small plastics with details.
- Apple tree, pear. Difficult to dry without cracking. Polished to a shine.
- Maple. It is difficult to cut, because the wood is very dense. It is used for making musical instruments.
- Rowan. It is used in turning, in a small plastic and polishing.
- Larch. Beautiful wood in processing. From it looks great products that do not have small parts and well polished.
- Cedar. Used in the creation of decorative art.
- Tis. Good for polishing. He is valued in the manufacture of furniture for beauty.
- Juniper. Sections of trunks are used in mosaic works. It makes beautiful decorations.
Safety precautions for cutting from wood

Simple patterns for cutting with a jigsaw.
- It is necessary to purchase an apron or gown of sufficiently dense material. When working sleeves should roll up to the elbow, and it is best to pick up clothes without sleeves.
- If the hair is long, then it should be gathered in a bun or hidden under a head-piece so that they do not accidentally fall into the rotating part of the tool.
- Get glasses with ordinary glasses. They will help protect your eyes from dust and particles of wood.
- Do not cut on your lap. Get clamps or stops.
- All the necessary tools for the job should be on your right.
- All cutting tools should be stored in special protective tips. If not, they can be made independently of rubber or foam.
- When firing wood products, make sure that there are no easily inflammable substances, such as gasoline, turpentine, varnish and others. Indoors must have a fire extinguisher.
- There should be a set of medicines not far away, because beginner masters can sometimes have varying degrees of injury.
Tools for cutting wood

Digit patterns for cutting with an electric jigsaw.
- Bogorodsky knife. Used to create sculptural technology.
- Knife-jamb (has a sharpening of 20 °). It is used for flat-relief, flat-skinned, openwork, relief execution.
- Knife-cutter. Additional subject. Required to perform many types of technology.
- Straight chisel (has sharpening 18-20 °). It is considered an additional subject when performing different technologies.
- Chisel of a semicircular form. One of the main devices that is needed to perform any type of activity. There are chisels of a sloping, medium and steep look.
- Chisel chisel. This tool has a curved blade.Due to this bending, the handle will not touch the work surface during operation.
- Chisel-cerazik. Sounds like a cool semi-circular tool. Has a width of a detail of 2-3 mm. Used for cutting thin veins. The cut will be sized according to the dimensions of the tools.
- Corners or geismus (has a sharpening angle of 50-70 °). Used to create a V-shaped notch and to perform various elements of the contour technique.
- Stichel. This tool has an angular bend of 15 °. The handle looks quite often, like a mushroom. Used to sample a variety of veins when making engravings.
- Klepiki. They have different dimensions, but the type of grinding they always have is only one of the three: the sword, the sheet and the nail. The first two types have names: klepiki-sheets and klepiki-swords. They are used in flat-relief and volumetric design to hide the background in hard-to-reach places.
- Chisel chisel. It differs from conventional klepikov only kind of honing. She looks like a nail. Its purpose is to perform work in difficult places and create parts of the clip-on machinery.
- Spoonbugs. A good form of this tool is a spoon knife, which has a sharpened ring with an attached rod. This item is used to remove large places in the depth and for processing internal surfaces when creating dishes.
- Punches and embossing are steel rods that have an ornament on the working finish. Required for embossing the background in plane-relief and relief execution.
Basic techniques for cutting wood with their own hands
Contour thread is a chisel drawing on wood material. You can perform it with the help of a knife, jamb, corner, cerazik, semicircular chisel. There is no need to sand the front base before doing the work, as the smallest dust particles will clog all the holes in the wood and the tool blade will become dull quite quickly.

Direction of the teeth of the file.
To smooth the surface, you can use a plane, a file with a large, and then with a small notch.
There are slight differences in cutting the pattern on plywood and board:
- Contouring on plywood. Begin training with cutting a solid background, and then go on to more complex elements. The contour thread looks very impressive if it is performed on a tinted surface. For this, a design is selected and the necessary piece of plywood is cut off. The ends are trimmed with sandpaper. After that, the front side should be covered with black nitrolacom. Instead, you can take mascara, gouache or stain.
- Contour thread on the board. With the help of a knife they make straight and rounded lines, which may have different directions depending on the layer of wood. After the notch, the board is rotated 180 ° and the same lines run from the other side. The main thing is to ensure that the length and depth are the same.
Geometric thread. This type of thread is very simple to perform. It does not require a complex tool.
The work will require soft non-textured species: aspen, linden, alder. Do not choose poplar. He is too soft. If you already have experience, then you can easily cope with birch and mahogany. Very beautiful ornament is obtained on the oak, but the carving will require great physical effort.
When performing this technique, observe the following rules:
- it is recommended to perform a cut with one movement, except for those elements of the figure that are large; one tilt angle, if no tilting change is provided for in the drawing itself;
- try to avoid cropping against the layer, since spalling can occur; to make layers
Geometric carving has a wide variety of elements: line, triangle, square, rhombus, eyes and scales. All these types allow you to create any composition.
Kudrino ornament

Tools for cutting out of wood.
This technique is a cutting out of plant elements, which consist of stylized leaves, buds, flowers. Sometimes images of birds, animals and various heroes from epics can be added.
Such an ornament is usually cut out on alder, linden, and aspen blanks; solid mahogany, ash, and oak bases are also used. The latter materials have a brilliant cut, but working with them will require considerable effort and frequent sharpening of the tool.
Usually, chisels and semicircular chisels are used to obtain the Kudrino relief. But if you do not have such tools, you can use a knife with a narrow mustache.
Relief carving in planar design
The most difficult type of execution. It looks quite impressive.
On the prepared plane we transfer the sketch of the planned ornament.All voids are removed with a suitable tool at an angle of 45 °. If there are large gaps between the parts of the ornament, then we cut a flat background from the tree.
To do this, use a hand mill that has a limitation stop, or a cranberry with a flat blade.
If desired, the product surface is smudged. To whiten the surface of the pattern, you just need to wipe it with a damp cloth. You can lighten the ornament even with the help of the skins. This is done only after complete drying of the product.
Cutting thread in planar design
By cutting off the entire background of the relief, i.e. removing the entire thickness of the material, the type of thread is obtained, which is called slotted. Its implementation is possible if the necessary details of the picture are bonded to each other, otherwise they will simply fall.
When performing a through thread, the prepared part with the applied ornament must be placed on a flat surface. This is necessary so that the back side does not form chips. With a curl or steep chisels, holes are cut in the background. It is recommended to do this work while standing, carefully cutting the tool into a wooden surface. With the help of a chisel that is suitable for a radius or jigsaw, they are cut off completely along the contour of the pattern of the ornament. To create the corners are used knives and corners. Once the background is removed, you can proceed to the ornament itself. Surface treatment and coating are made at the discretion of the master.
Mosaic from wood
This method has been used for a long time. With it, they made decorations for furniture, made wall panels, lined the floors, created art products. According to its technique, the mosaic has the following varieties:

Variants of plywood butterflies.
- Inlay - small inserts of bones, mother of pearl, various wood into another material. In the main material, which is considered the basis for the product, perform grooves. It is in them that various insertion elements will be placed and fastened. This method can decorate the surface or create whole compositions, shapes.
- Block mosaic - includes the connection of individual sticks or different platelets, which can be made of different shades of rocks. After that, the material is sawing. The parts are obtained with the same elements of the pattern. These materials are used to produce different compositions or individual pieces of decoration.
- Intarsia - plates of various types of wood are inserted into the prepared wooden base.
- Marquetry - in this technique, an inserted element is planed veneer - plywood, having one layer and made of different wood. They glue the veneer to the wooden base, trying to fit each other tightly together the various parts that are needed according to the sketch.
With proper use of the color variety of wood and with a large amount of it, the mosaic gives a good opportunity to create complex patterns and beautiful scenes.
Basic products for beginners

Wood duck scheme.
Every newcomer who chooses to do wood carving will definitely try to make lightweight items first. They become the first test and will give you the necessary skills.
- Spoons. When performing this item, the basics of the most common types of carving are mastered.
- Kitchenware. Mostly start with a cutting board. It is there that one can learn to perform various techniques of execution.
- Ornaments made of wood. Allow you to acquire the skills of more complex technologies.
Basic steps when working
Working with a tree requires complete feedback, although for some it is just a hobby.
- The first step in working is preparing the necessary tool. Be sure to check the tools and, if necessary, sharpen them. After all, only a sharp object can create a neat job. Even if simple work is planned, you still need to prepare several types of cutters with different blades.
- Next, the wooden blank itself is prepared. A picture is selected. If you are a beginner who loves carving, then choose only soft breeds.
- In order not to have to postpone work for later, immediately study the material on the product you plan to perform. If you can, ask the master to help you. After all, it is an expert in his business that will tell one or another cut. This craft is quite difficult to learn from the written materials.
- Then prepare the workplace. Apply the pattern to the blank and start cutting.
- Once all the elements have been cut, it is necessary to sand the finished part. If necessary, varnish.
Summing up
Woodcarving is a rather complicated craft. For a beginner, it will not be easy to perform even simple elements.You will need to be patient and make maximum efforts.
For a long time a person has been engaged in processing wooden canvases and is well aware of all its quality characteristics. Wood carving is considered quite ancient art.
Today you can find quite a lot of special schools that teach wood carving. This type of activity does not relate to the usual repair work. Although this craft is sometimes used in such activities. For example, it will allow you to easily hide the formed wood flaws (scratches, knots), easily and beautifully decorate unattractive doors, furniture, etc.
Didn't find the answer in the article? More information on the topic:
-

How to mount the beam to the wall?
Detailed instructions for fixing the beam to the wall. Features mounting hard and soft ways. Installation of timber on the wall of brick. Lists of necessary tools and materials.
-

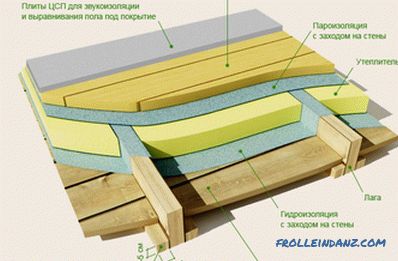
Tightening the wooden floor by yourself
Step by step instructions on how to do the screed on the wooden floor with his own hands. Necessary for work tools and materials. The main stages of the workflow. Calculation of the mixture for the room.
Search
Related Articles
Arbolitovy blocks - shortcomings, technical characteristics, dimensions, composition
Arbolite is described in most sources as a material with wonderful properties. Advertising articles extol arbolitovyh blocks, material flaws are modestly silent. But miracles do not happen, there ar...
Making your own bathroom + photo

Bathroom is considered one of the most visited places in apartments. That is why everyone tries to give her such a look that she looked attractive and pleased the residents with her comfort. When...
sequence of actions (photo and video)

The interest of developers to such a roofing structure as a gable roof is fully justified. This type of roof is the most common in the world. It is especially popular with builders of private house...
creation methods, options (photos and videos)
How to make a rough floor in a wooden house? To implement this venture, you must first understand what it is and what methods of creating such coatings exist at the present time. Such floors in a w...
How to remove the bubbles on the linoleum
Bloated linoleum On improperly laid linoleum, if it is used intensively after a certain period of time, air bubbles may appear, which increase in size over time. The flooring takes on an unsigh...