The construction of a wooden dwelling requires carpentry skills and appropriate carpentry tools. The construction process consists of several stages, not too complicated, but very responsible. Before you build a house from a bar, you should carefully study the technology, choose the right material and make calculations. This will help not only to carry out the task qualitatively, but also to reduce construction costs.

When constructing a house from a bar, it is recommended to use a strip foundation.
Site preparation and foundation construction
A strip foundation is best suited for the construction of a log house. They begin work with site preparation: they clean high vegetation and stones; all the grooves and mounds align, make markings. By marking dig a trench with a width of 25 cm, the depth of the trench depends on the quality of the soil on the site and the height of the structure. Timber is a relatively lightweight building material, and therefore a one-story timber house can be installed on a shallow foundation. If you plan to build 2 floors or the soil under the house is too loose and unstable, the depth of laying the foundation should correspond to the depth of soil freezing, from 1.2 to 1.5 m.

Types of timber and logs.
For the manufacture of the foundation it will be necessary:
- crushed stone and sand;
- concrete mortar;
- board or plywood for formwork;
- iron rods for reinforcement;
- building level.
Rubble is poured into the prepared trench with sand, and then a reinforcing mesh is formed from twigs. It is not recommended to use welding for connecting rods, it is better to take a knitting wire. On the sides of the trench fix the formwork and pour the concrete solution. If you can not buy a ready-made solution, you need to mix the cement with sand and gravel in the ratio of 1: 3: 4; Cement grade should be 400 or 500. It takes about 2 weeks to set the foundation.
Laying the first row

The framework of the wooden house from a bar.
For a log house, it is only necessary to choose whole, even bars without visible defects. The first crown should consist of the strongest timber cut from the core of the tree. This can be determined by the density and location of the rings on the cut. It is very important that the wood is dry and light - bars with dark spots or gray cuts are not suitable for a log house.
In the process of laying the following materials and tools will be needed:
- roofing material;
- liquid bituminous mixture;
- antiseptic;
- wooden pins;
- planer;
- drill;
- hammer;
- hacksaw.
The surface of the base strip is covered with liquid bitumen, on which roofing material is laid. Such waterproofing reliably protects the house from a bar from penetration of moisture from the base and prolongs the term of its service several times. The width of the ruberoid should be greater than the width of the foundation by 20-30 cm so that its edges are hung at the same distance on both sides. At the joints, the material is laid with an overlap of 7-10 cm, it is thickly coated with bitumen and firmly pressed.

Bar fasteners.
When assembling the first row, you need to decide on the type of corner joints. The most economical option is a half-tree connection, when the upper part of the lower timber is cut out and the lower part of the upper timber. With this method of fastening consumes less material, the ends of the bars do not extend beyond the corners of the structure. Before assembling, all wooden elements must be treated with an antiseptic and dried, and then holes are drilled for nogs. These holes should be located along the timber every one and a half meters.
After the construction material is processed, the first crown is laid. First, from the two opposite sides, the first 2 beams are laid onto the foundation, then another 2 are lowered at right angles on top of them with grooves cut out at the ends. The corners fit tightly with a sledgehammer and level the entire row, the protruding sections should be corrected with a plane.
Arrangement of floor slabs

Floor for a house of laminated veneer lumber.
When the first row of the frame is laid and fixed, you need to install the floor slabs and the base of the supporting walls. In the process of installation will be needed:
- wooden beams with a section of 150x100 mm;
- a hacksaw;
- a hammer;
- a level and a tape measure.
In two opposite bars from the inside, shallow grooves are cut every 40 cm. Experts recommend cutting not rectangular, but T-shaped grooves, the ends of the beams are cut accordingly. This method of tie-in is called “dovetail” and is used to increase the strength of the joints of the frame with internal partitions and floors; it is possible to make such grooves by means of the manual milling machine. When installing beams, be sure to check their horizontal building level.All beams must be in the same plane, otherwise the floor of the log house will be skewed.
Construction of the walls of the building

Construction of the wall of the beam.
The next stage is the construction of walls. For work you will need:
- timber;
- insulation;
- construction level;
- pins;
- handsaw;
- chainsaw.
In order for the assembly of the walls to be of the highest quality, special attention should be paid to connecting the corners. There are several ways of dressing a log house: in the bowl, in the paw, on the root spike. The first 2 options are used for round logs, while the third method is ideal for a rectangular beam. Dressing on the root spike is somewhat laborious, but it gives the maximum density of the joints. The process itself looks like this: at the ends of one beam, 2/3 of its thickness is cut off, leaving a flat rectangular spike. At the ends of the other timber, cut out the corresponding dimensions of the groove, into which the spike will enter. After connecting the bars fastened pins with the previous row and the next.
In each row, the location of the grooves and spikes should alternate.
Nogie can be metal or wood, while building a log house with your own hands is better to use wooden fasteners. The standard thickness of the pins is 25 mm, height - from 120 to 150 mm. It is recommended to drill holes for fasteners 2-3 cm deeper. The walls are assembled according to the following scheme: a row is laid, the corner joints are fitted, a heater is laid on the top perimeter, the next crown is laid and the pins are driven in.
Jute, felt and tow are good insulants for a log house, many compacted with a frame with ordinary moss. The most convenient way is to use felt jute tape: a roll of insulation is rolled around the crown perimeter and secured with stapler brackets. Tow and moss are more difficult to lay, and the appearance of the log house after such insulation does not look too neat. After assembling several rows, it is necessary to cut out window openings, and make narrow holes for air exchange in the cuts. In the last 2 rows should cut the grooves under the ceiling, then you can proceed to the final stage - the assembly of the roof of the house with your own hands.
Roof assembly technology
Ceiling beams are laid at a distance of 90 to 110 cm; for residential attics, beams with a section of 150x200 mm are used; for a non-residential one, a timber of 100x150 mm is suitable. Further rafters and basic racks fasten, the bar-shaped pediment gathers, the obreshetka is mounted. The battens should be no thicker than 2 cm and about 15 cm wide. The rafters pitch depends on the weight of the roof covering: the heavier the roof, the smaller the distance. Standard is left between the rafters of 1.2 m. All elements are fastened with nails or self-tapping screws, special attention is paid to the fasteners of supporting racks.
A waterproofing material is placed on top of the batten, then comes the turn of the roofing: tiles, corrugated board, slate or other material. At this building a house with his own hands is considered complete. This step-by-step guide will help the novice master to get the job done without serious blunders, and minor fixes are not so difficult. Responsible attitude, lack of haste, accuracy and diligence at every stage is a guarantee of durability, reliability and comfort of your home!
Didn't find the answer in the article? More information on the topic:
-

What to glue the flooring with your own hands
What to glue parquet? You can use different glue, its features depend on what kind of parquet is planned to glue. The first step is plywood, which should be well polished.
-

Nuances of the technology for laying the floorboard
Will consider the technology of laying the floorboard, the most necessary tools and materials. Thanks to this technology, the floors will always be smooth and durable.
Search
Related Articles
DIY LED tape installation

LED strip is a modern, versatile light source that can be used for decorative purposes inside and outside rooms. Multi-tiered ceiling structures, interior arches and niches, furniture, cars, billboa...
Making shelves do-it-yourself: features
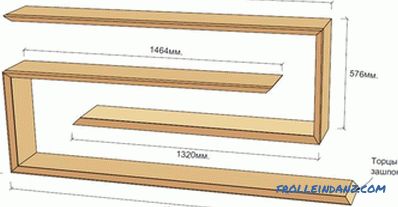
Nothing is simpler than the implementation of a carpentry project. However, he, like other undertakings, requires an indicative planning and budgeting. Making your own shelves requires similar plan...
Penoplex technical characteristics, properties and applications + Video
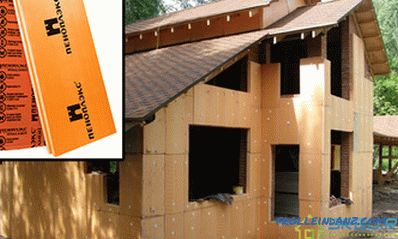
Penoplex heaters are nothing more than extruded polystyrene foam. It belongs to the new formation of heat insulators, which are very effective in terms of heat retention. In this article we will loo...
Patio in the country with their own hands
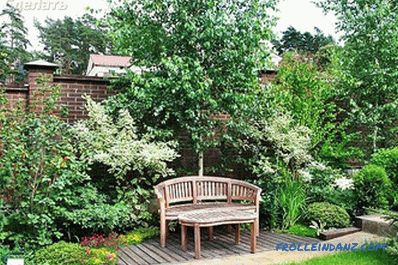
Patio is an equipped outdoor area among beautiful plants designed for relaxation. The main elements of such a corner for recreation are a flat, paved with natural materials playground and comfortabl...
How to choose an oil heater for an apartment or house

As soon as autumn begins to openly declare its rights, it becomes cold in unheated apartments, especially at night. So people are rushing to the store for heaters designed to bring the long-awaited...